Learn how to implement TallyPrime POST API to Integrate Third-party applications with TallyPrime
TallyPrime POST API Integration mainly requires 2 parties as below;
- Third-party Software Developer who can implement POST API to send data
- TallyPrime User who can implement Tally Plugin/TCP to import data
Quick Integration Steps
Basically our TallyPrime POST API Integration works in 3 simple steps as explained below;
Step 1: Implement our TallyPrime API POST URL + Headers + JSON Body in your application from where you would like to send the data
Step 2: Configure our .TCP plugin file and TallyPrime-API-Sync.exe file in your TallyPrime in which you would like to received the data
Step 3: Either you define schedule to import data automatically or sync data on-demand as and when required
In this section you will get step by step understanding of how to implement TallyPrime API
Steps to be performed by Third-party Developers
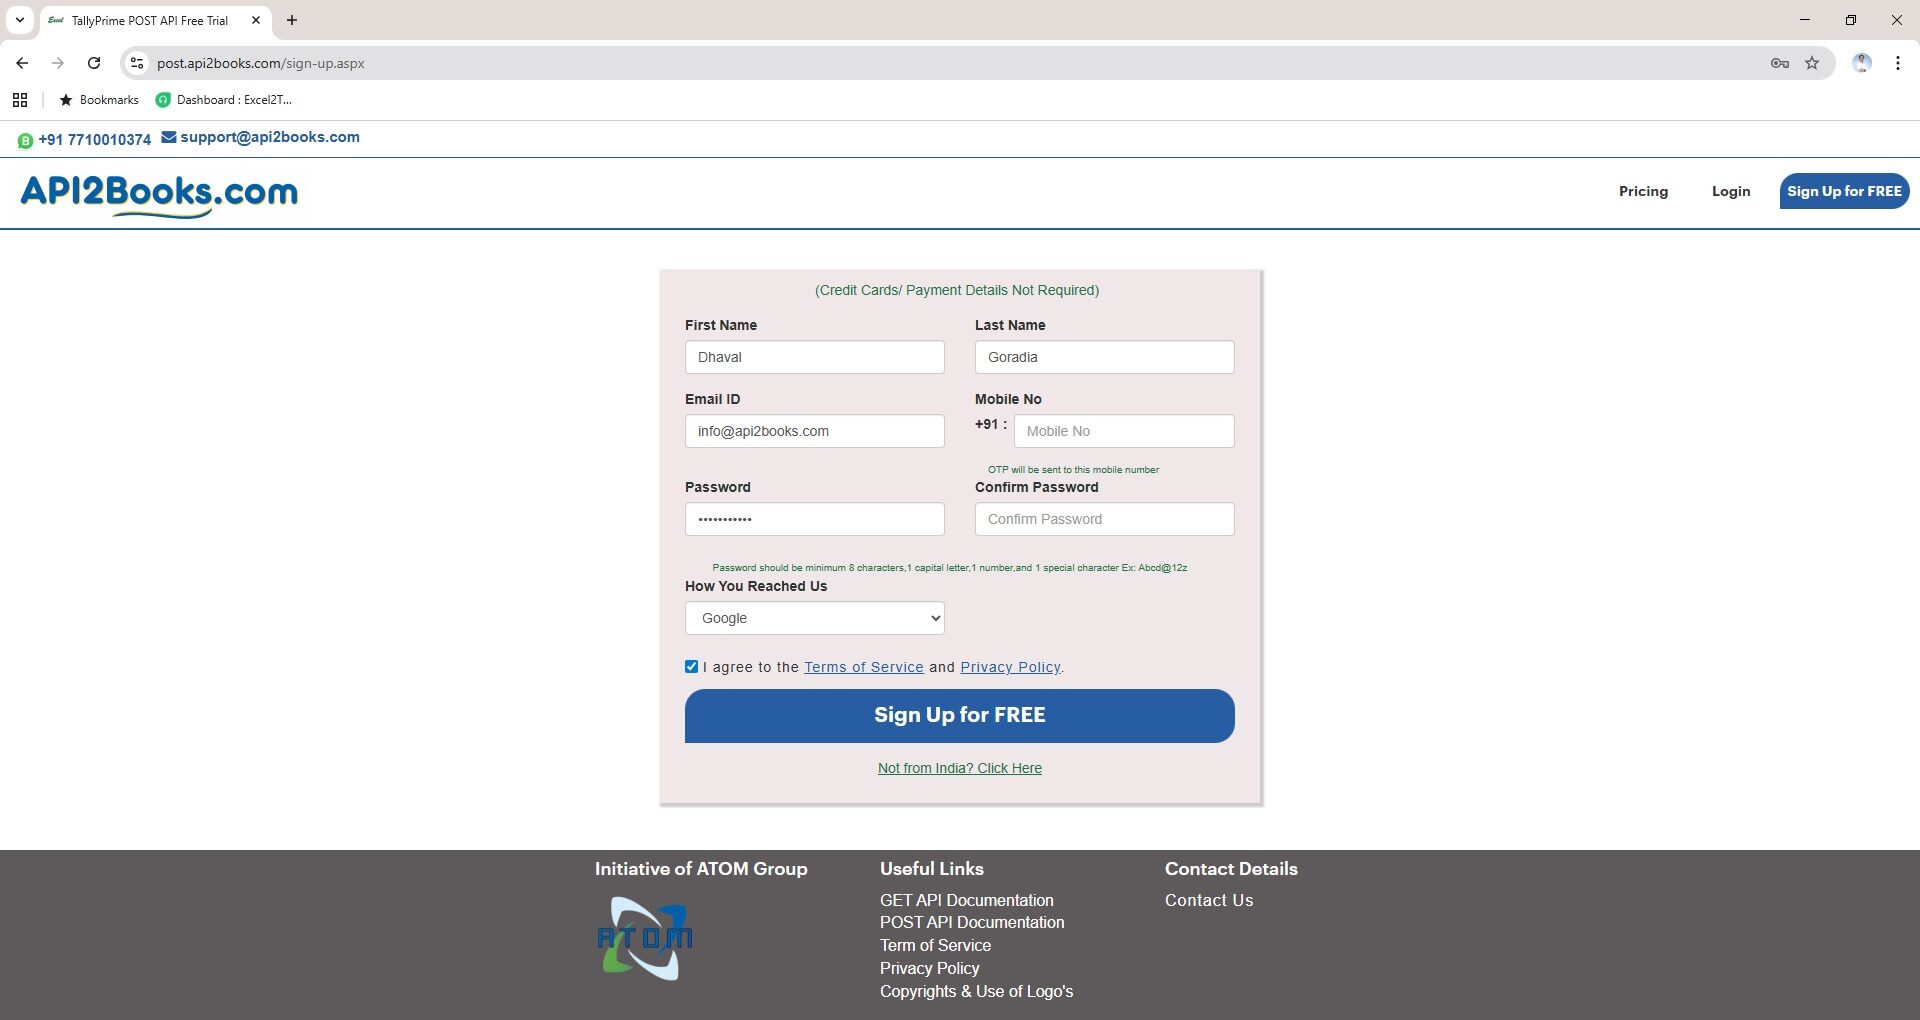
Signup/Create API Account
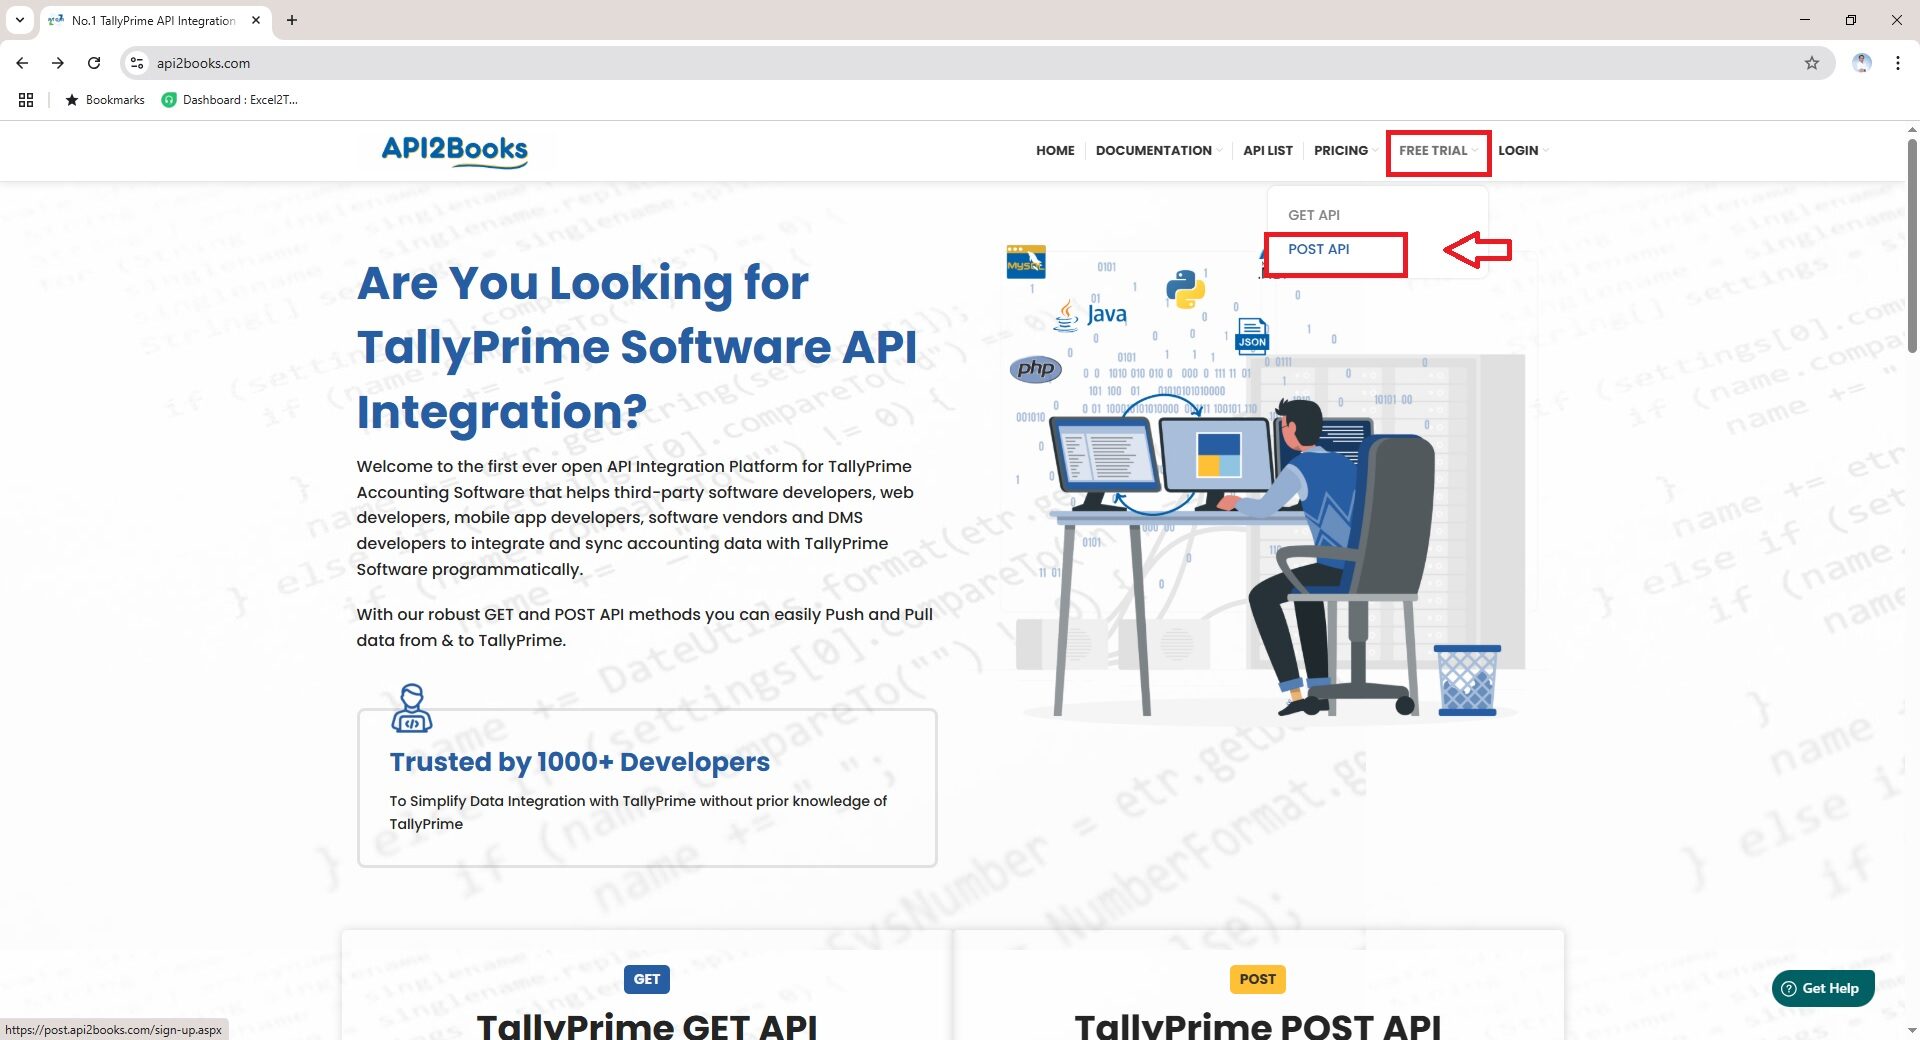
Visit our website API2Books.com and create your free trial account
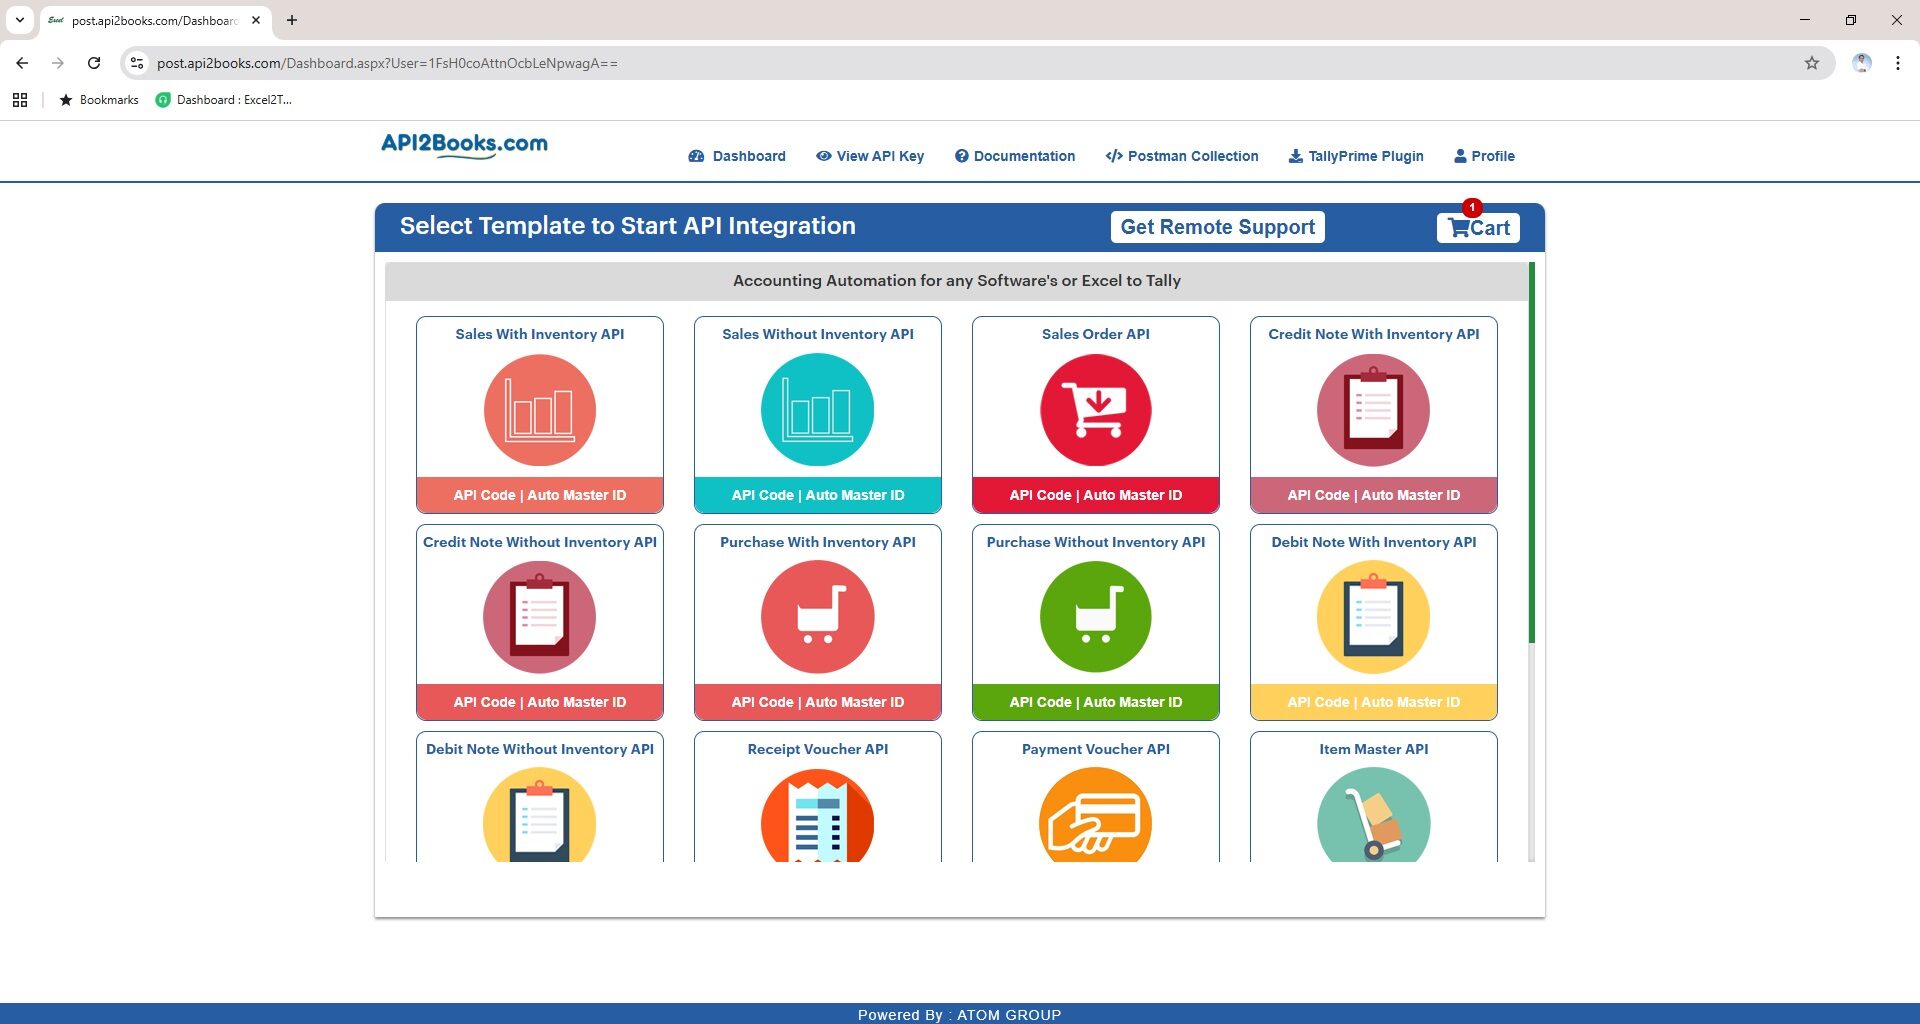
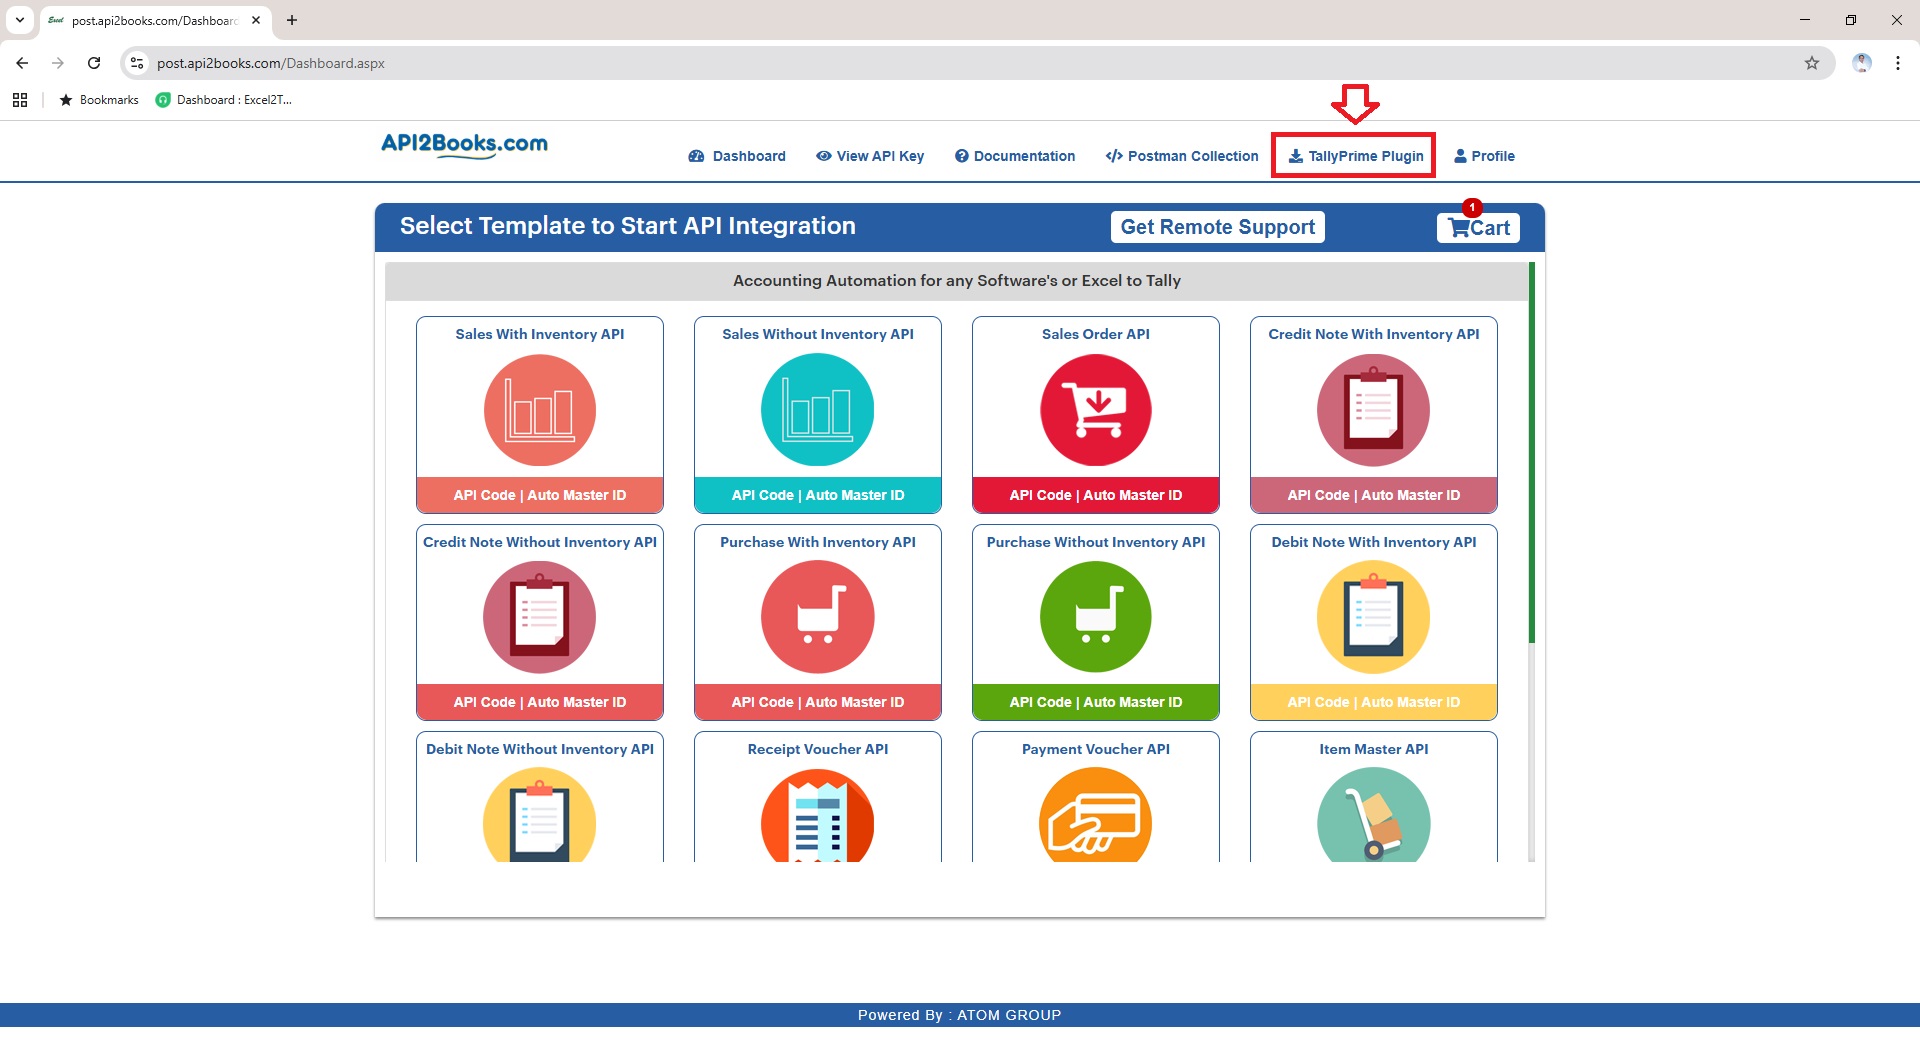
Dashboard
Once you are done with the signup, login to your account and you will be redirected to your Dashboard area where you will find POST API’s for all the Tally Masters and Vouchers.
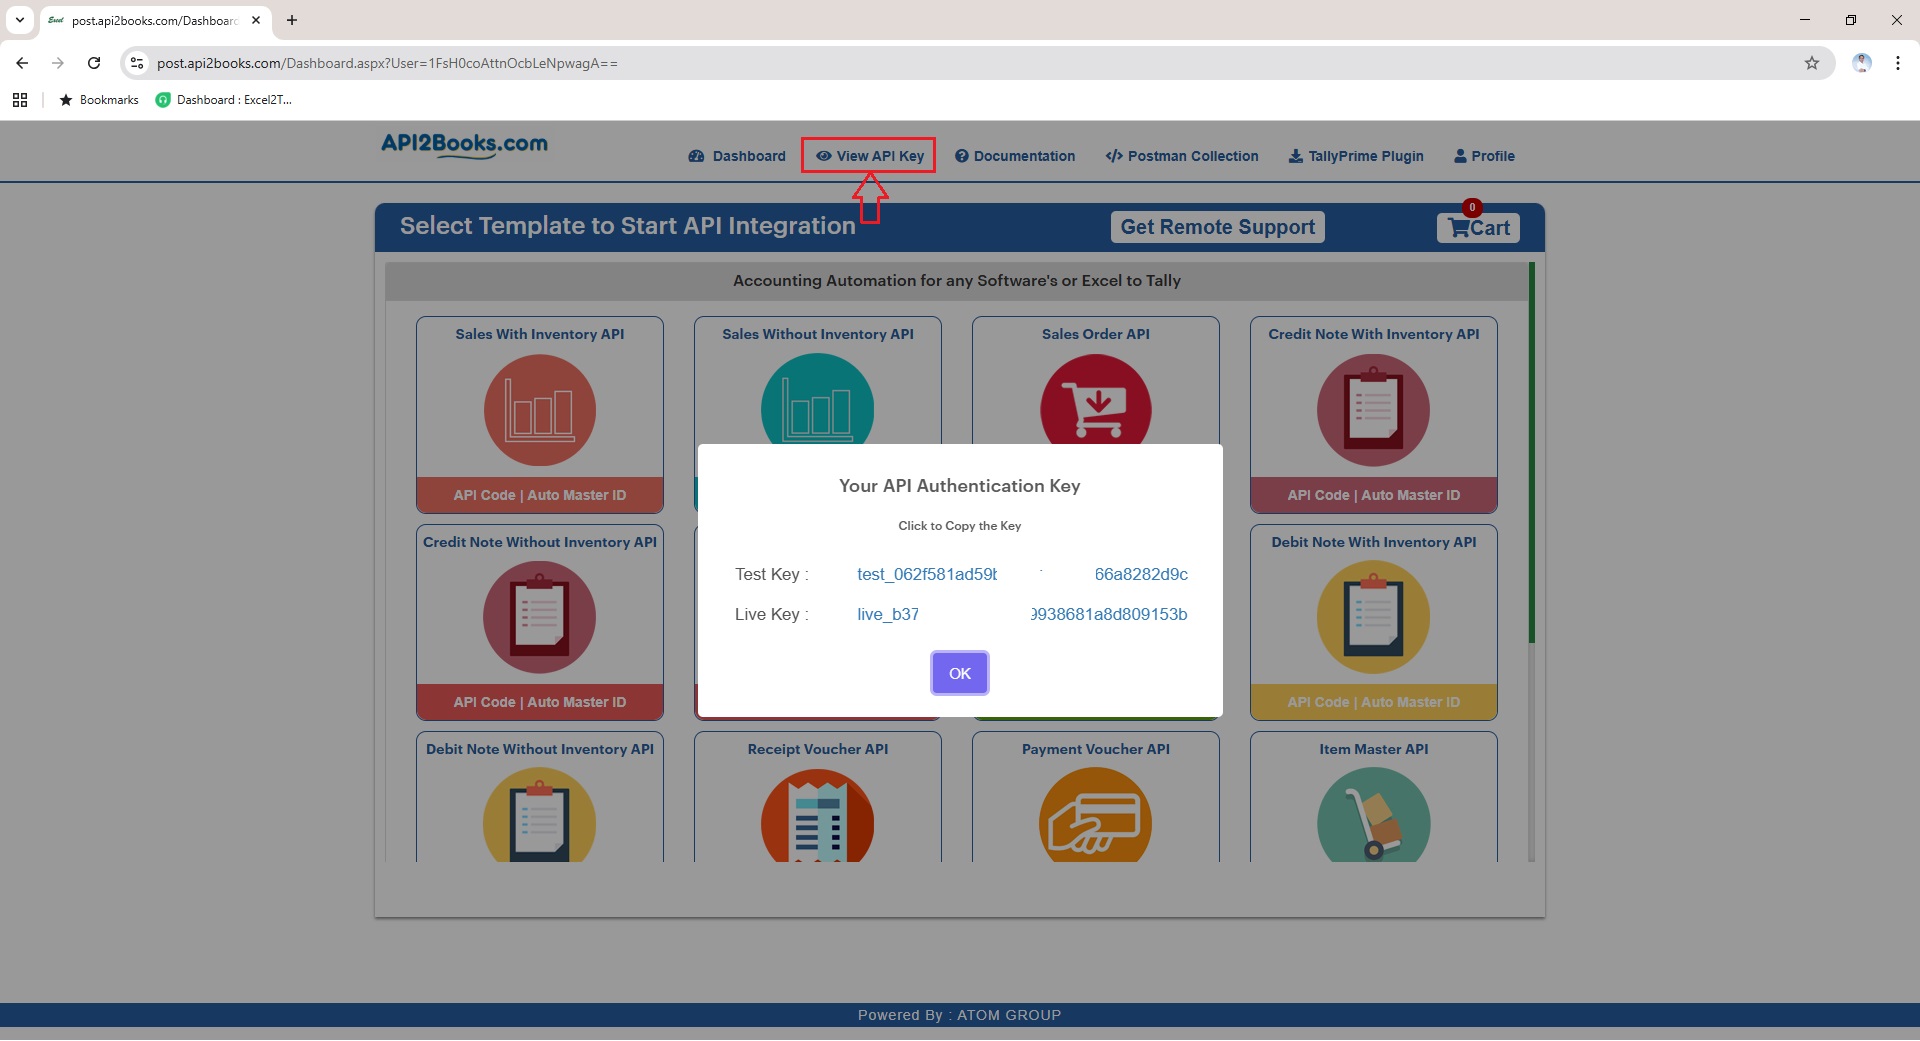
Generate POST API Auth Key’s
Click on View API Key option to get your unique Test Key and Live Key as shown in below snapshot.
Test Key :
You can use Test Key to perform tests by sending data from your application to TallyPrime. In Test Key you are allowed to send up-to 450 records after which you will get the response message as “Your Free Limit is Exceeded”
Live Key :
Using live key you can send unlimited data from your application to TallyPrime. Validity of the Live key is subject to the subscription you have opted
URL, Headers & Body
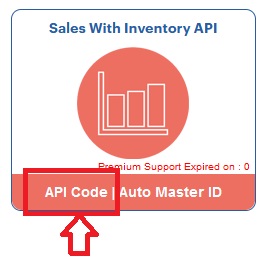
Third-party software developers can now click on view API Code for any template that you wish to integrate in your application/ERP.
On the next screen you will get complete details of;
- POST API URL on which you need to send the data
- Header
- JSON Body
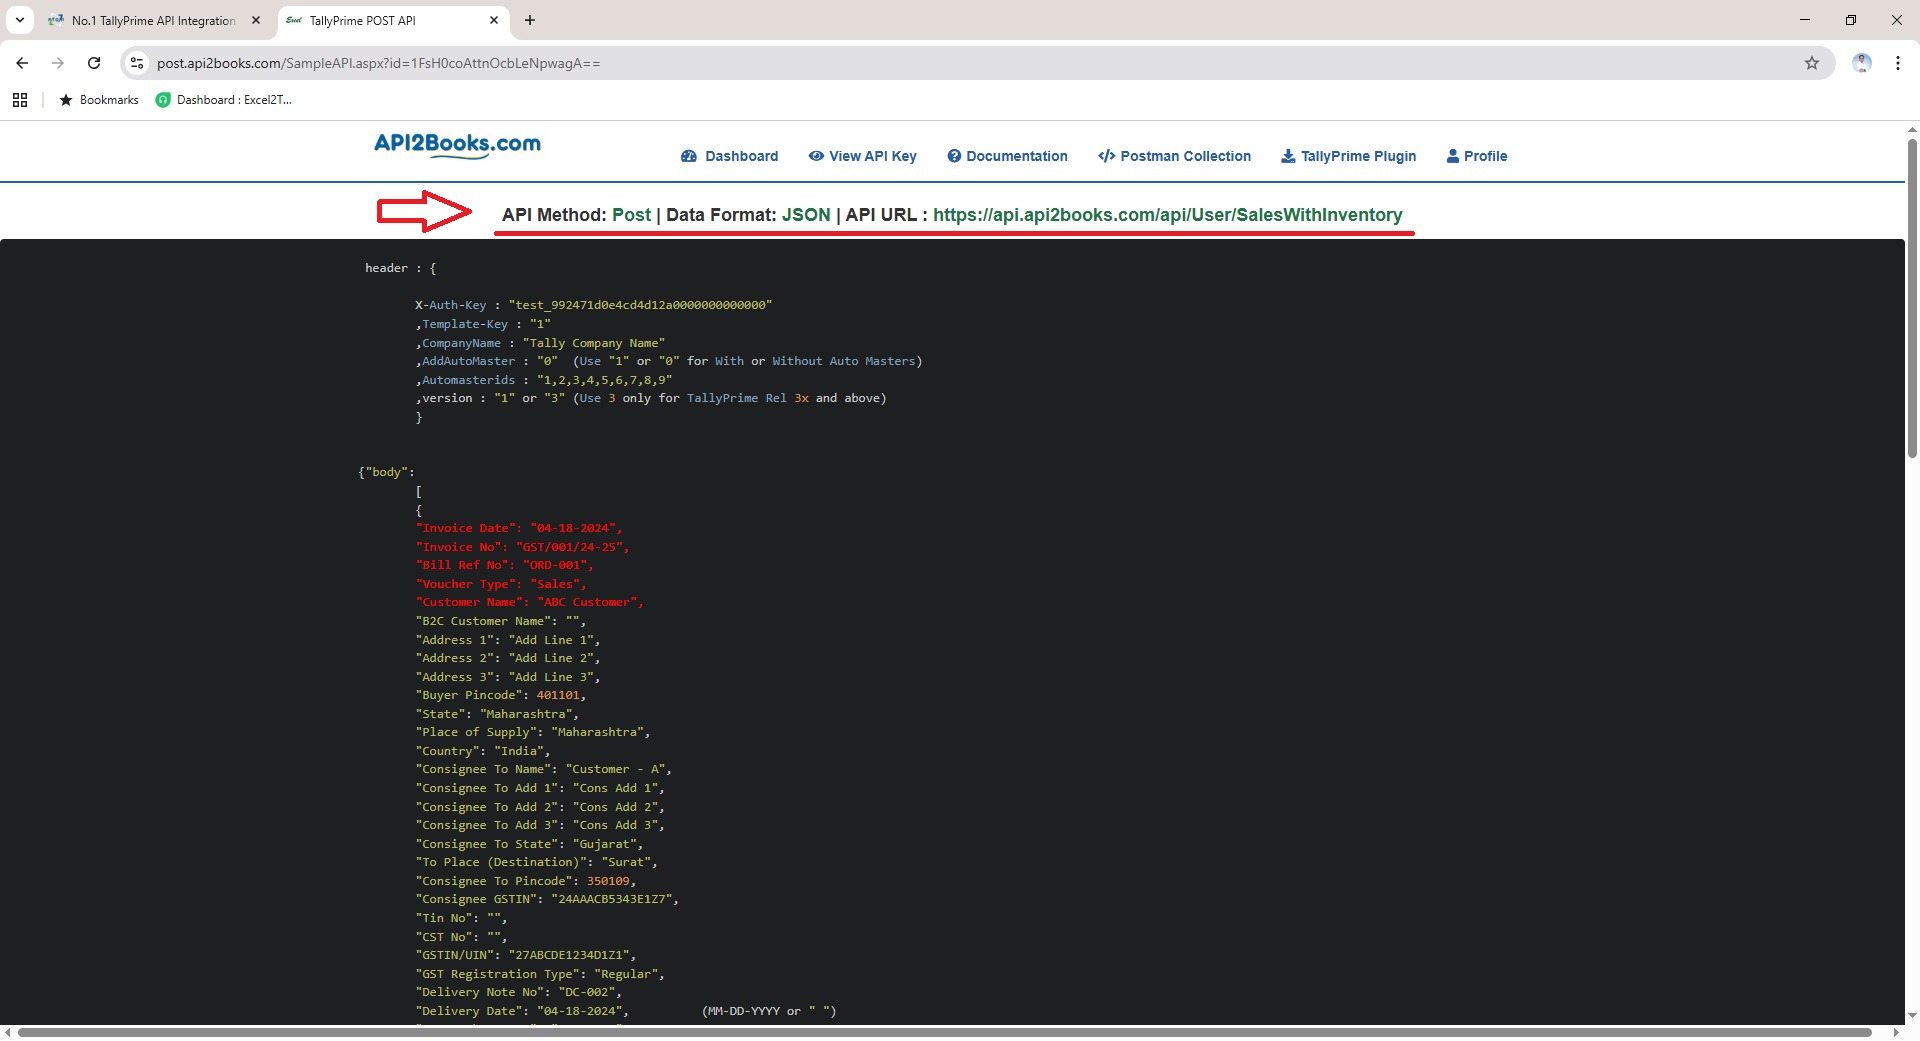
- X-Auth-Key : This will be your Test or Live Key as explained in above section
- Template-Key : This will be the template key belongs to each template type. This identifies the type of data you are sending to TallyPrime whether it is sales, purchase, receipt, payment, etc
- CompanyName : Company name defined here should match with the company name you are sending in your POST request else data will not get imported in TallyPrime.
- AddAutoMaster : Set “1” if you want to auto generate dependent masters along with the data you are sending or Set “0” if you have already created dependent masters in Tally and just want to send the vouchers.
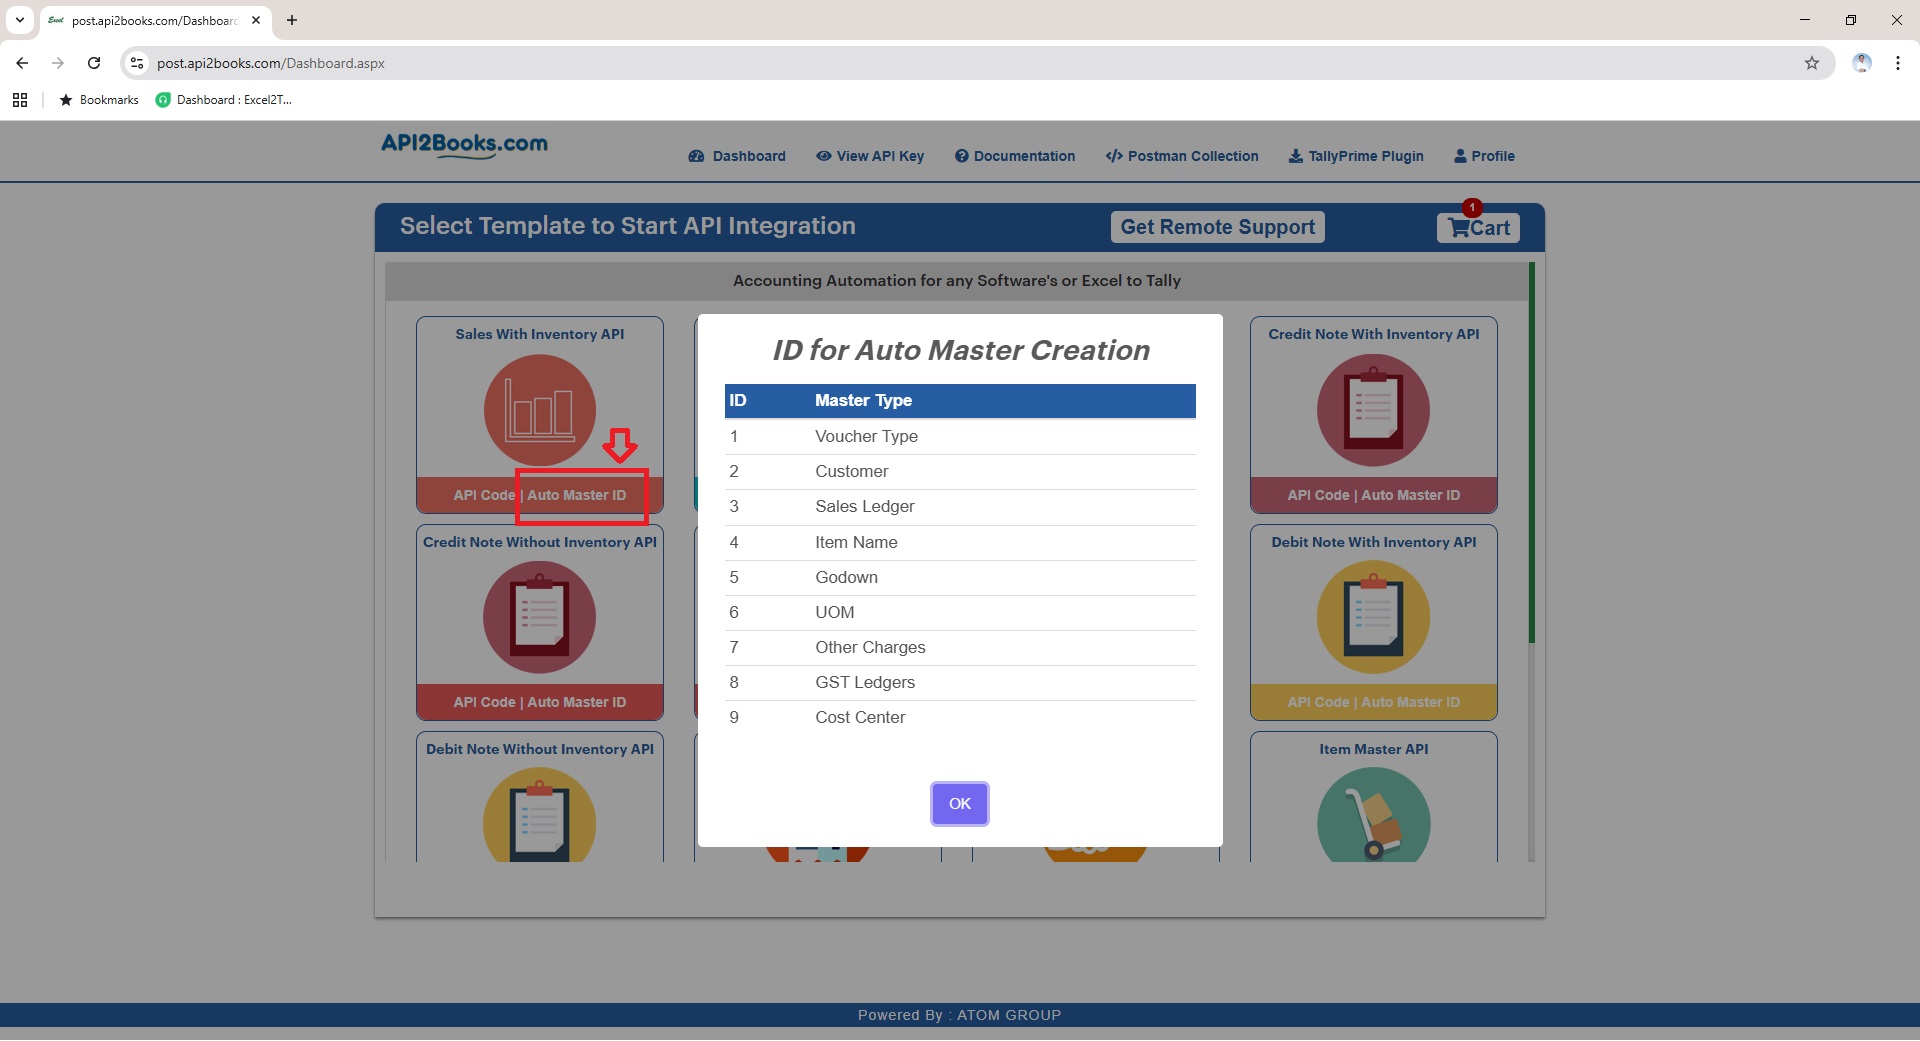
- Automasterids : If you are going to auto generate the dependent masters along with data then you will have to define the Master ID’s from the available list of ID’s in your Header.
- Masters are like Customers, Stock Items, Groups, Voucher Types, Units of Measurements, Godowns, etc. without which voucher can’t be created.
- Version : Depending upon the Tally version you are using, you will have to define “1” or “3” or “5”. Set 5 for TallyPrime Version 5 & Above | Set 3 for TallyPrime Version 3 & Above | Set 1 for TallyPrime Version 2 & Below
- Body
- Body contains your actual data that you wish to import in Tally. Each templates are having it’s different body structure. It is important for you to follow the body fields and it’s value carefully to avoid errors while sending data to API server.
- Fields highlighted in the red are compulsory and can not be left blank where as fields in green are optional and you can left them blank
API Testing via POSTMAN
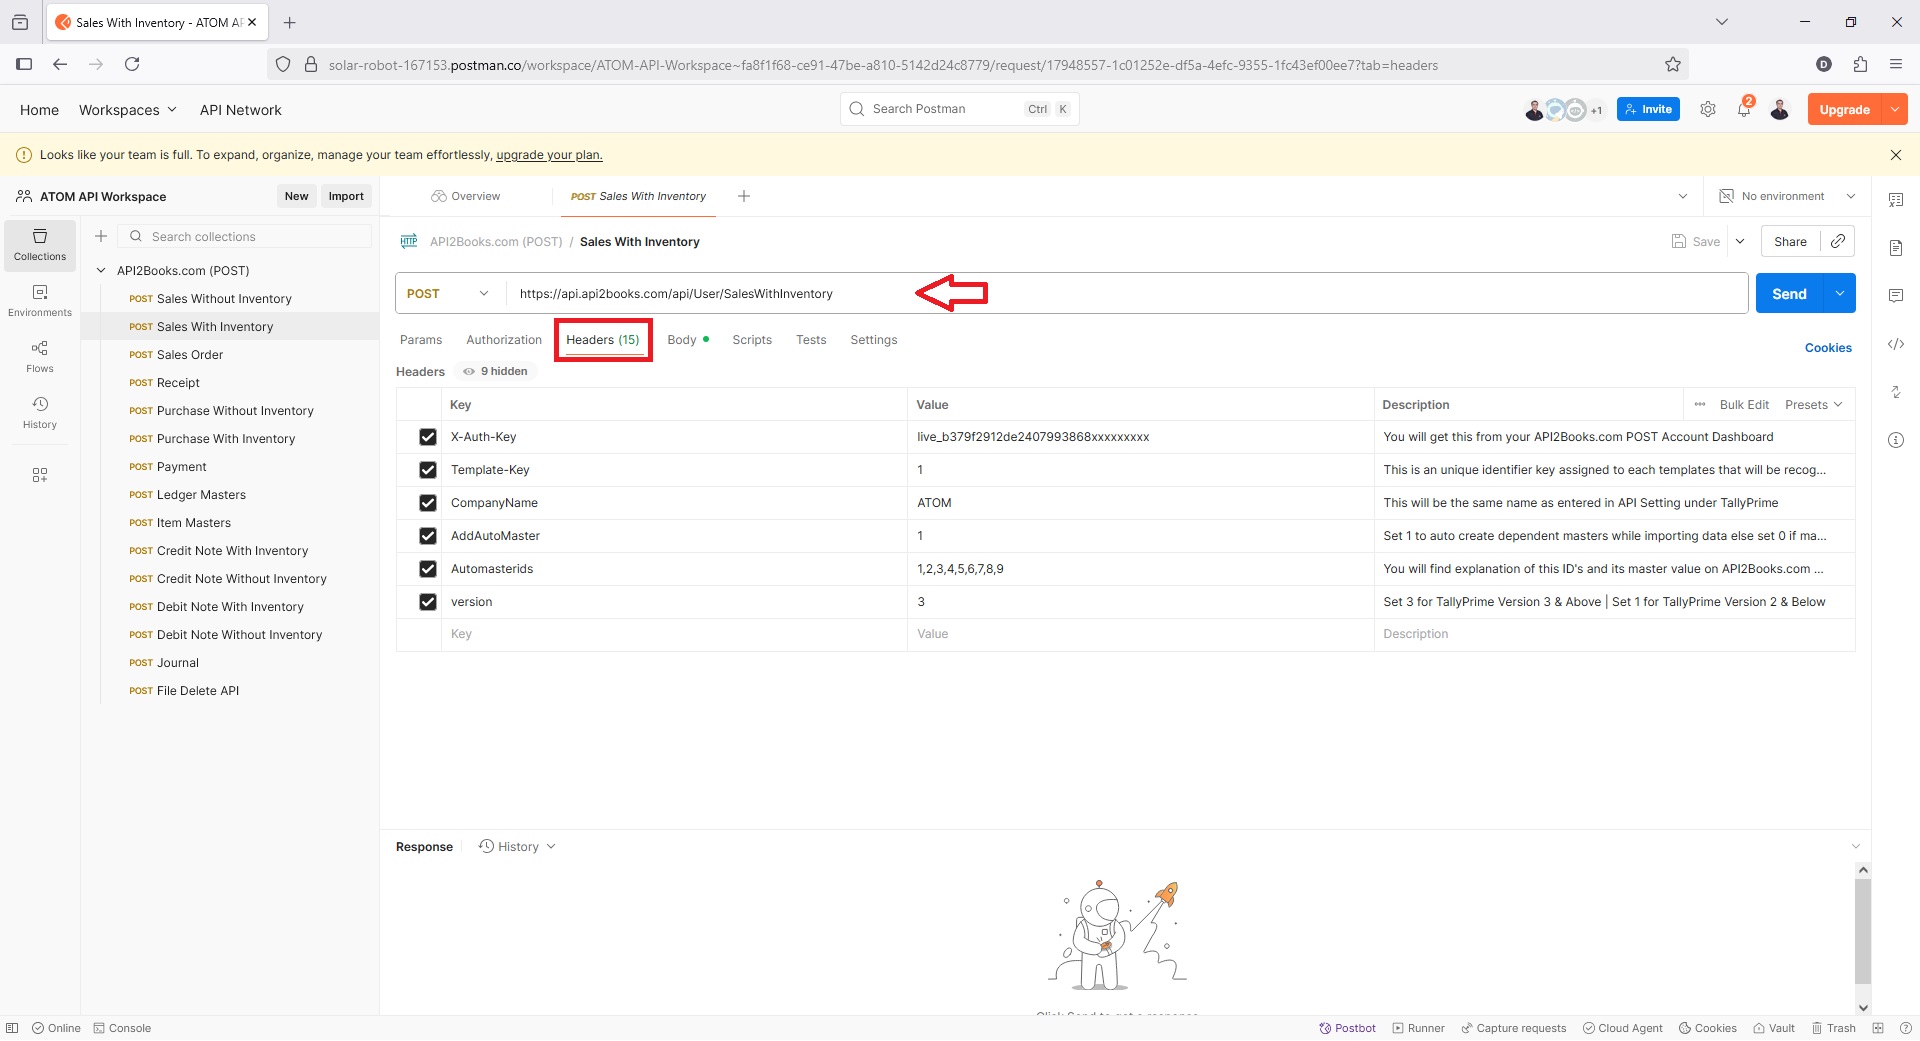
We recommend you use Postman application to perform your testing to check the end to end data flow.
You can download complete TallyPrime POST API postman collection from here
Headers
Body & Response
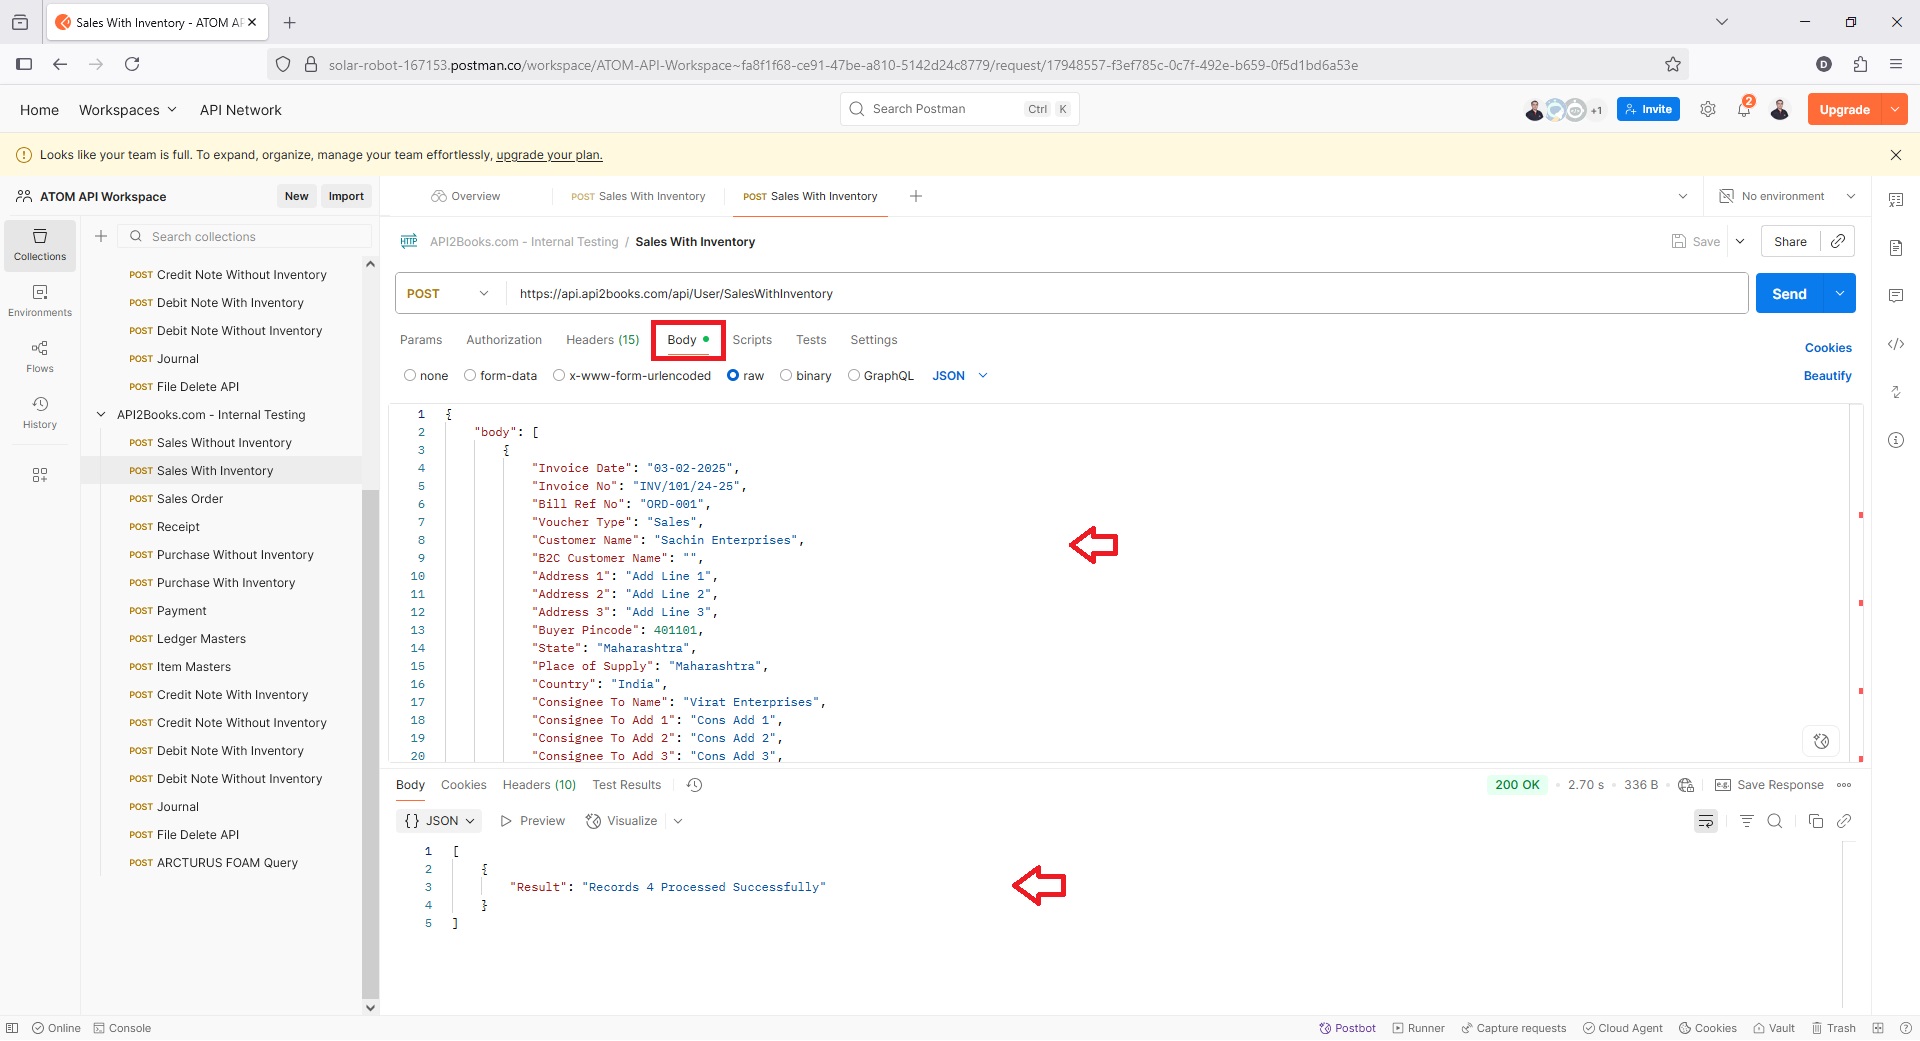
Above example indicates, 3 records are submitted successfully to the TallyPrime API server and is now ready to import in TallyPrime Data.
Steps to be performed by TallyPrime User
Follow the steps below to be configure for TallyPrime POST API Plugin for importing data from POST API Server;
Download TallyPrime API Plugin
Download TallyPrime Plugin from your Dashboard.
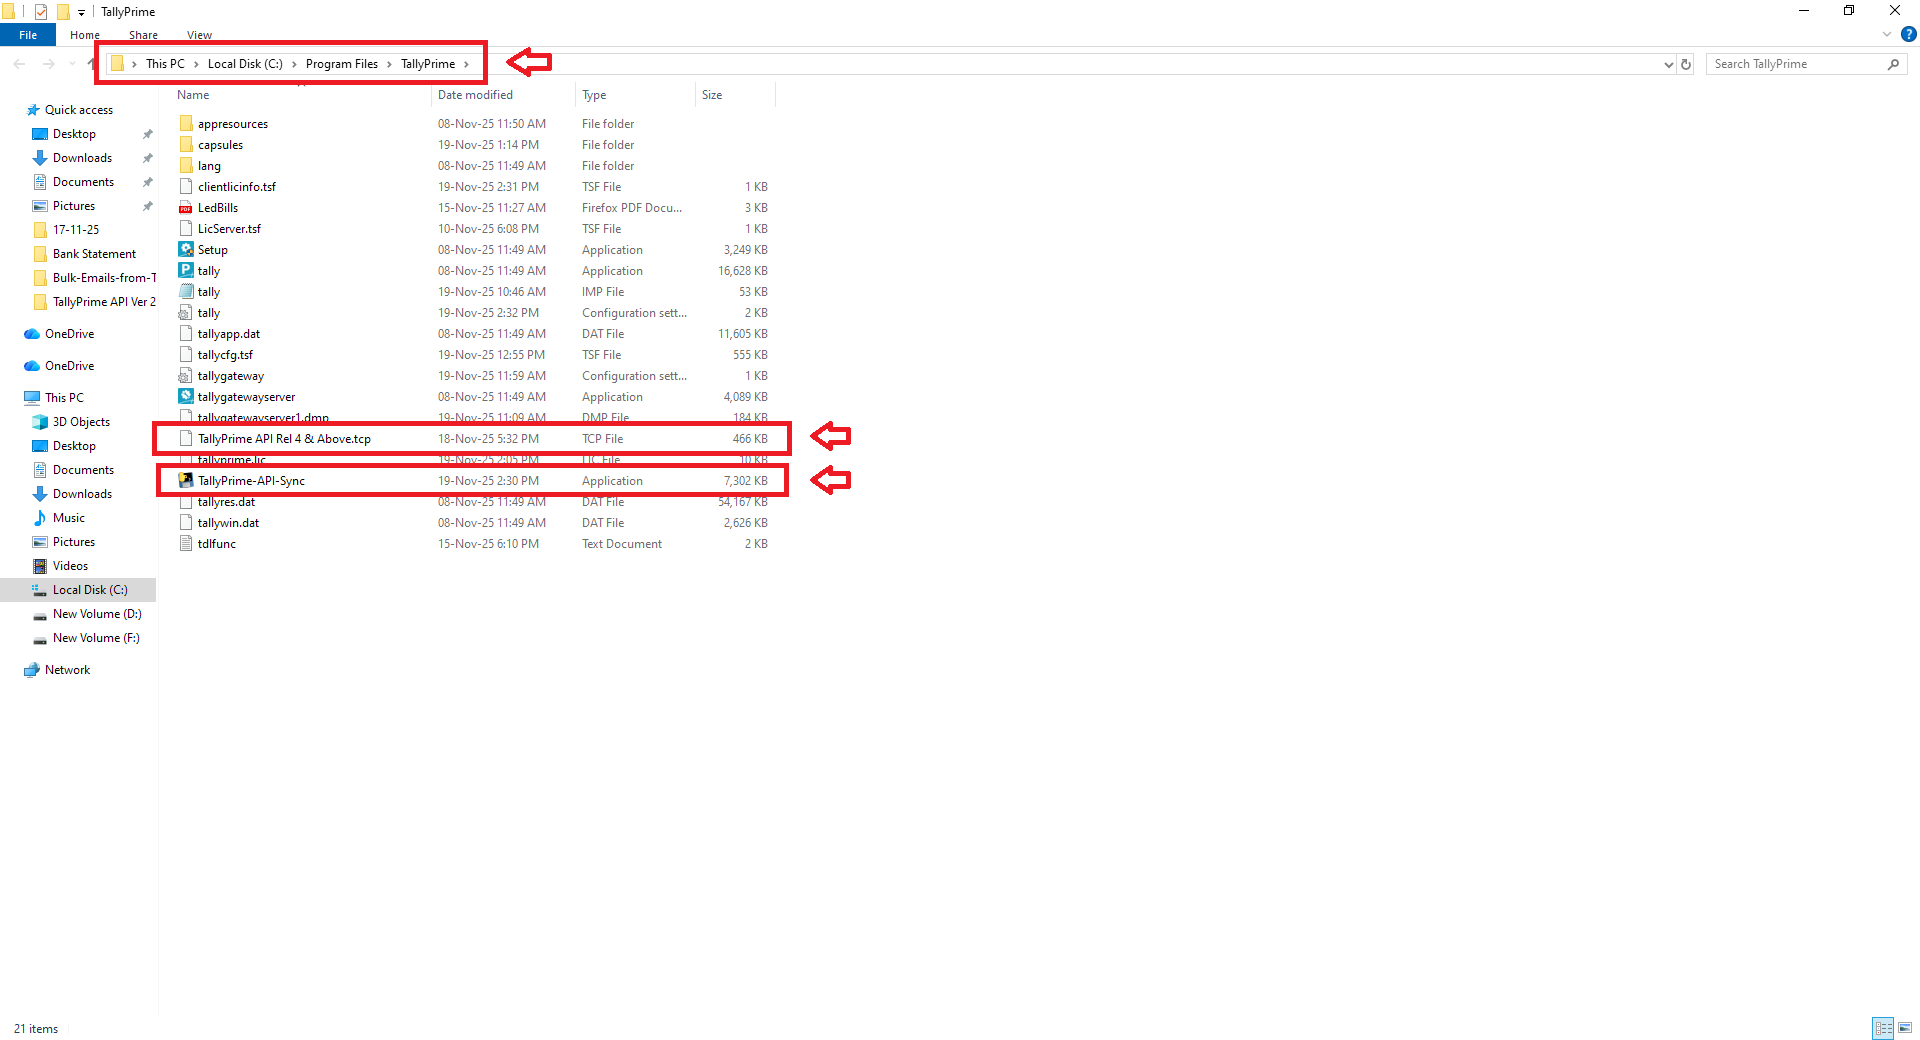
Configure TallyPrime API Plugin
Copy .TCP file as per your TallyPrime Version and TallyPrime-API-Sync.exe files in your TallyPrime folder
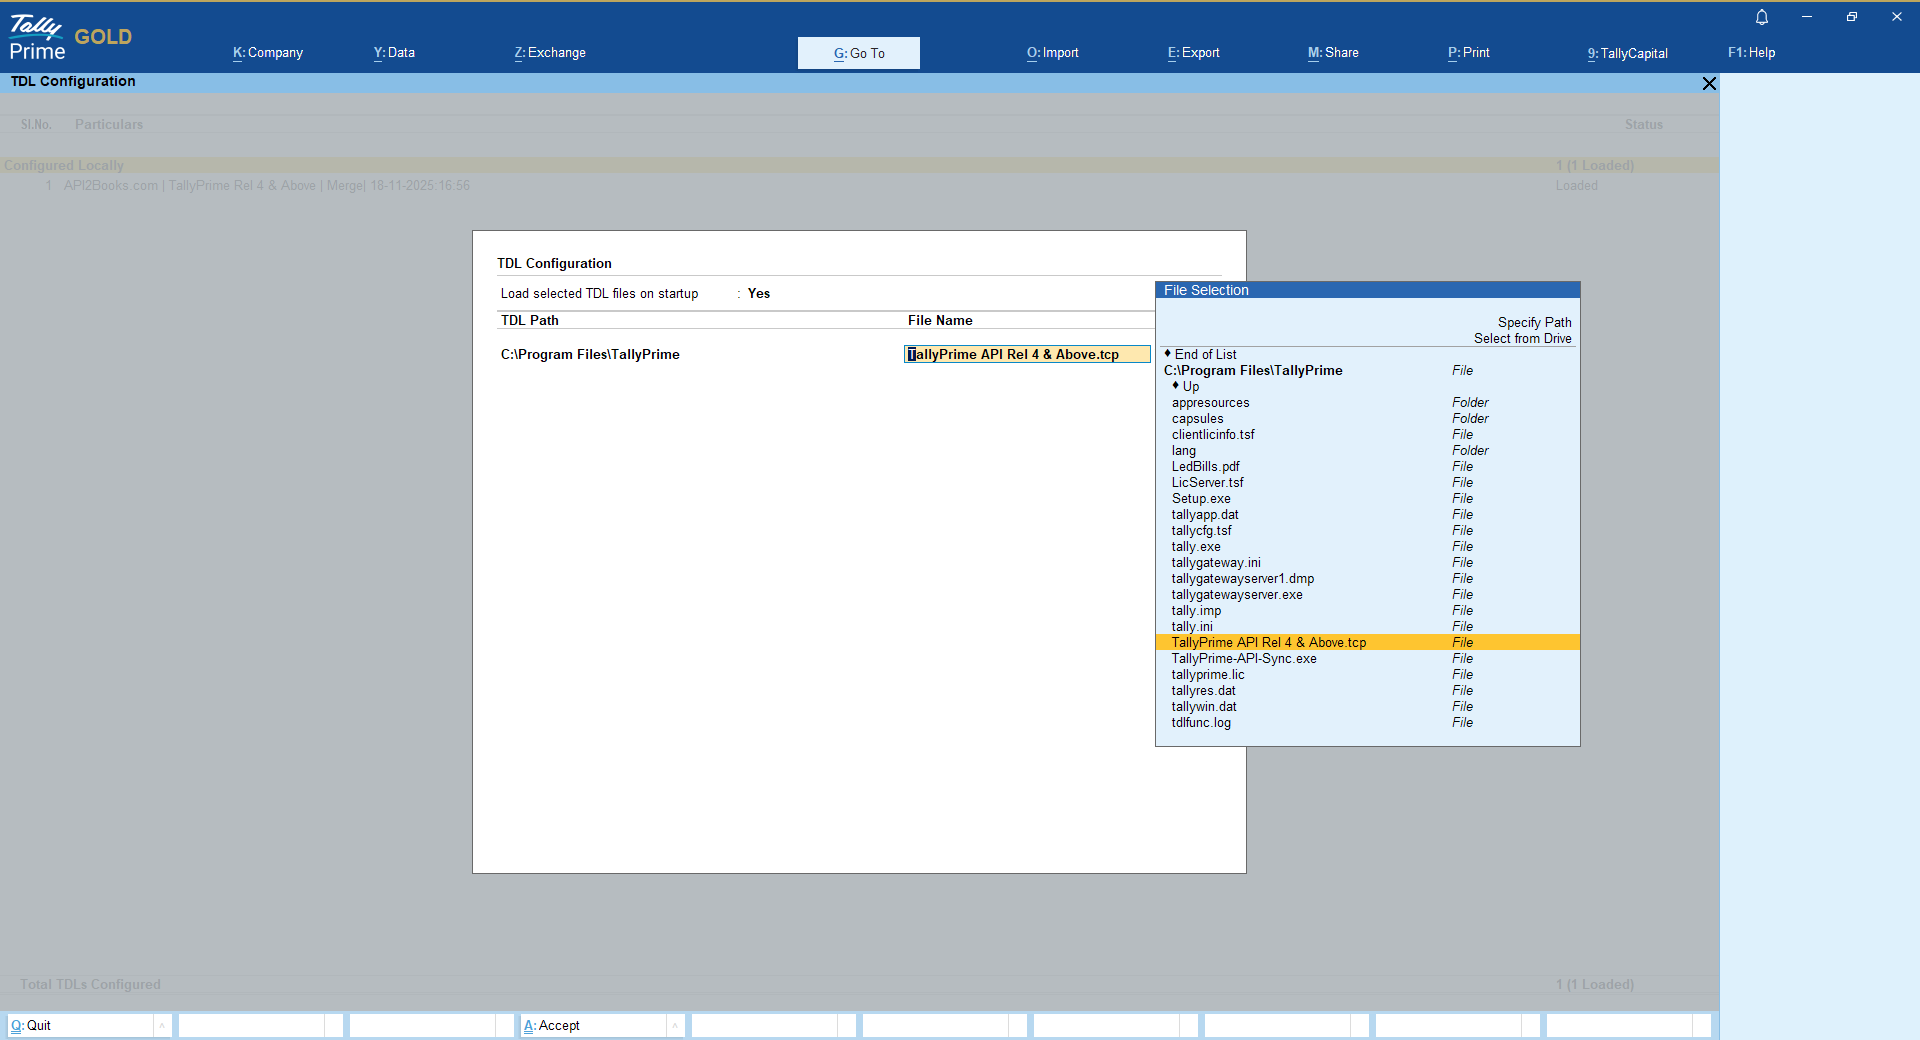
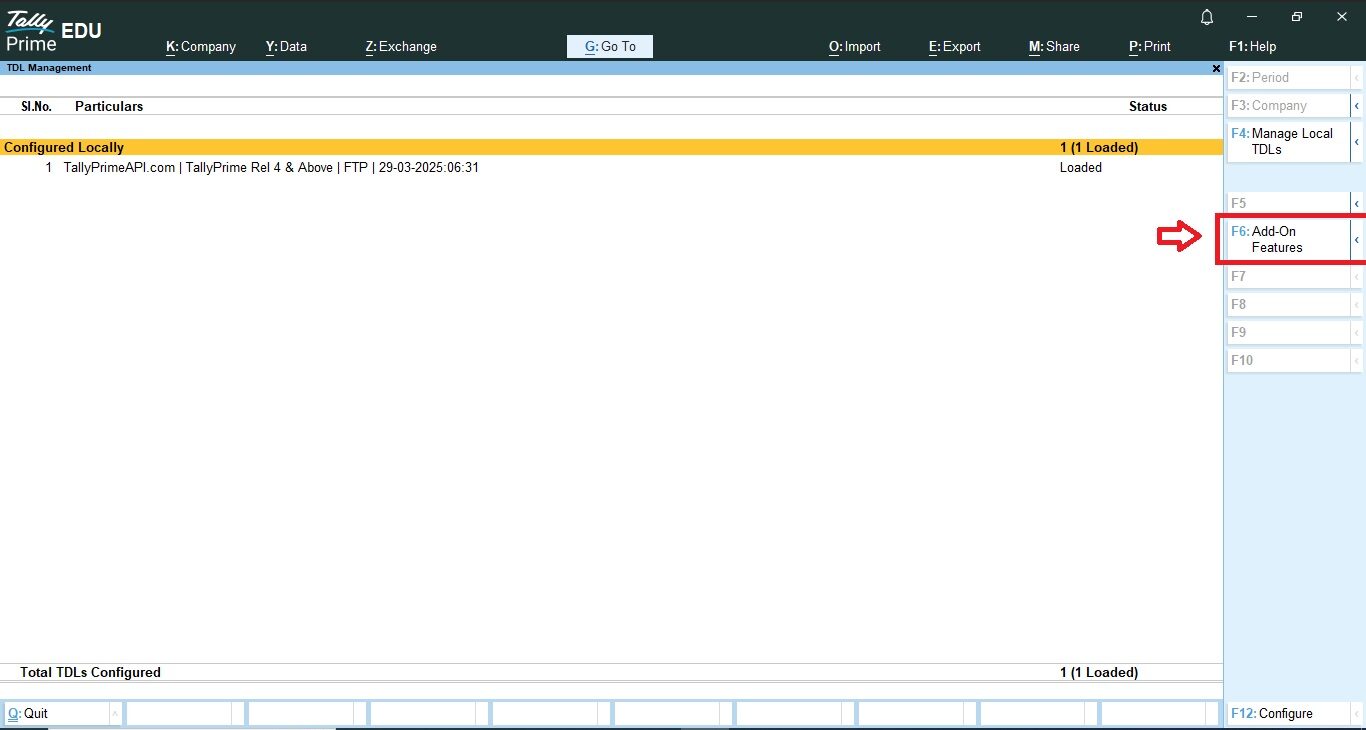
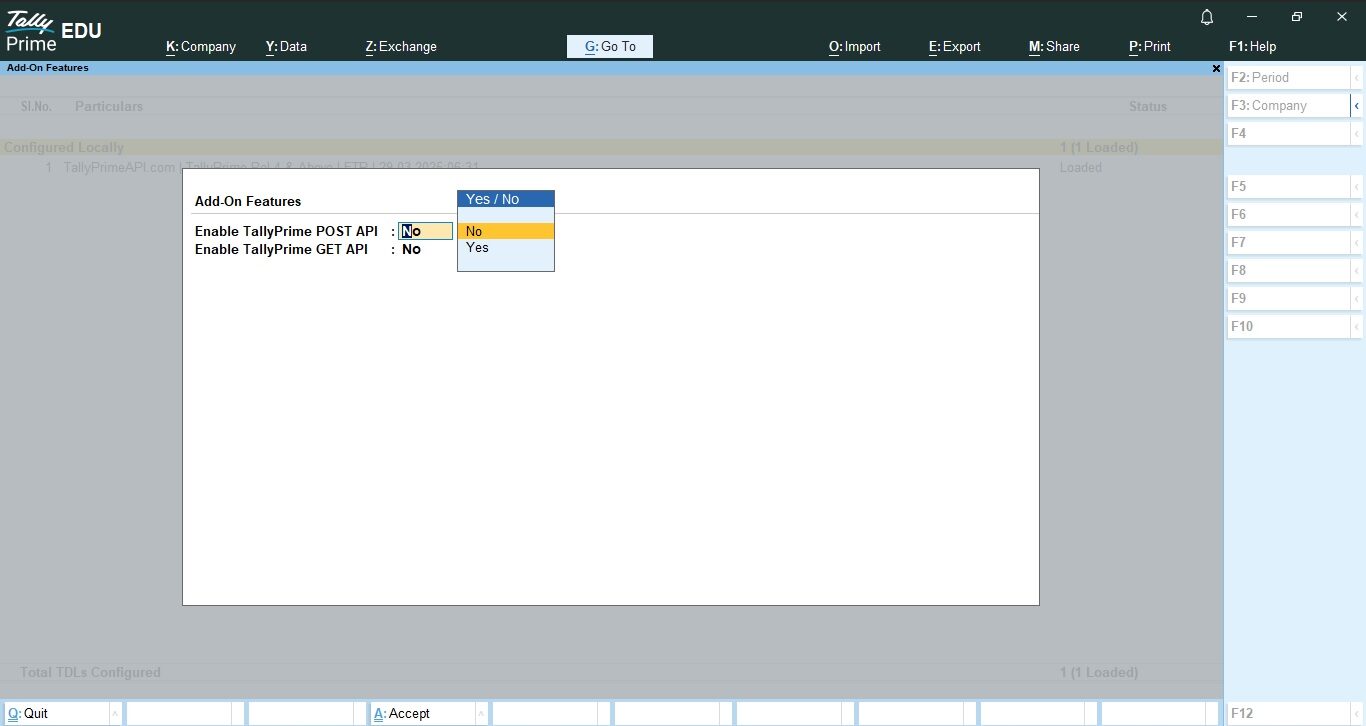
Open TallyPrime > Press F1: Help > TDLs & Add-ons > Press F4: Manage Local TDLs to load the TallyPrimeAPI.tcp file and Press F6: Add-on Features to Activate the API Module as shown in below snapshots;

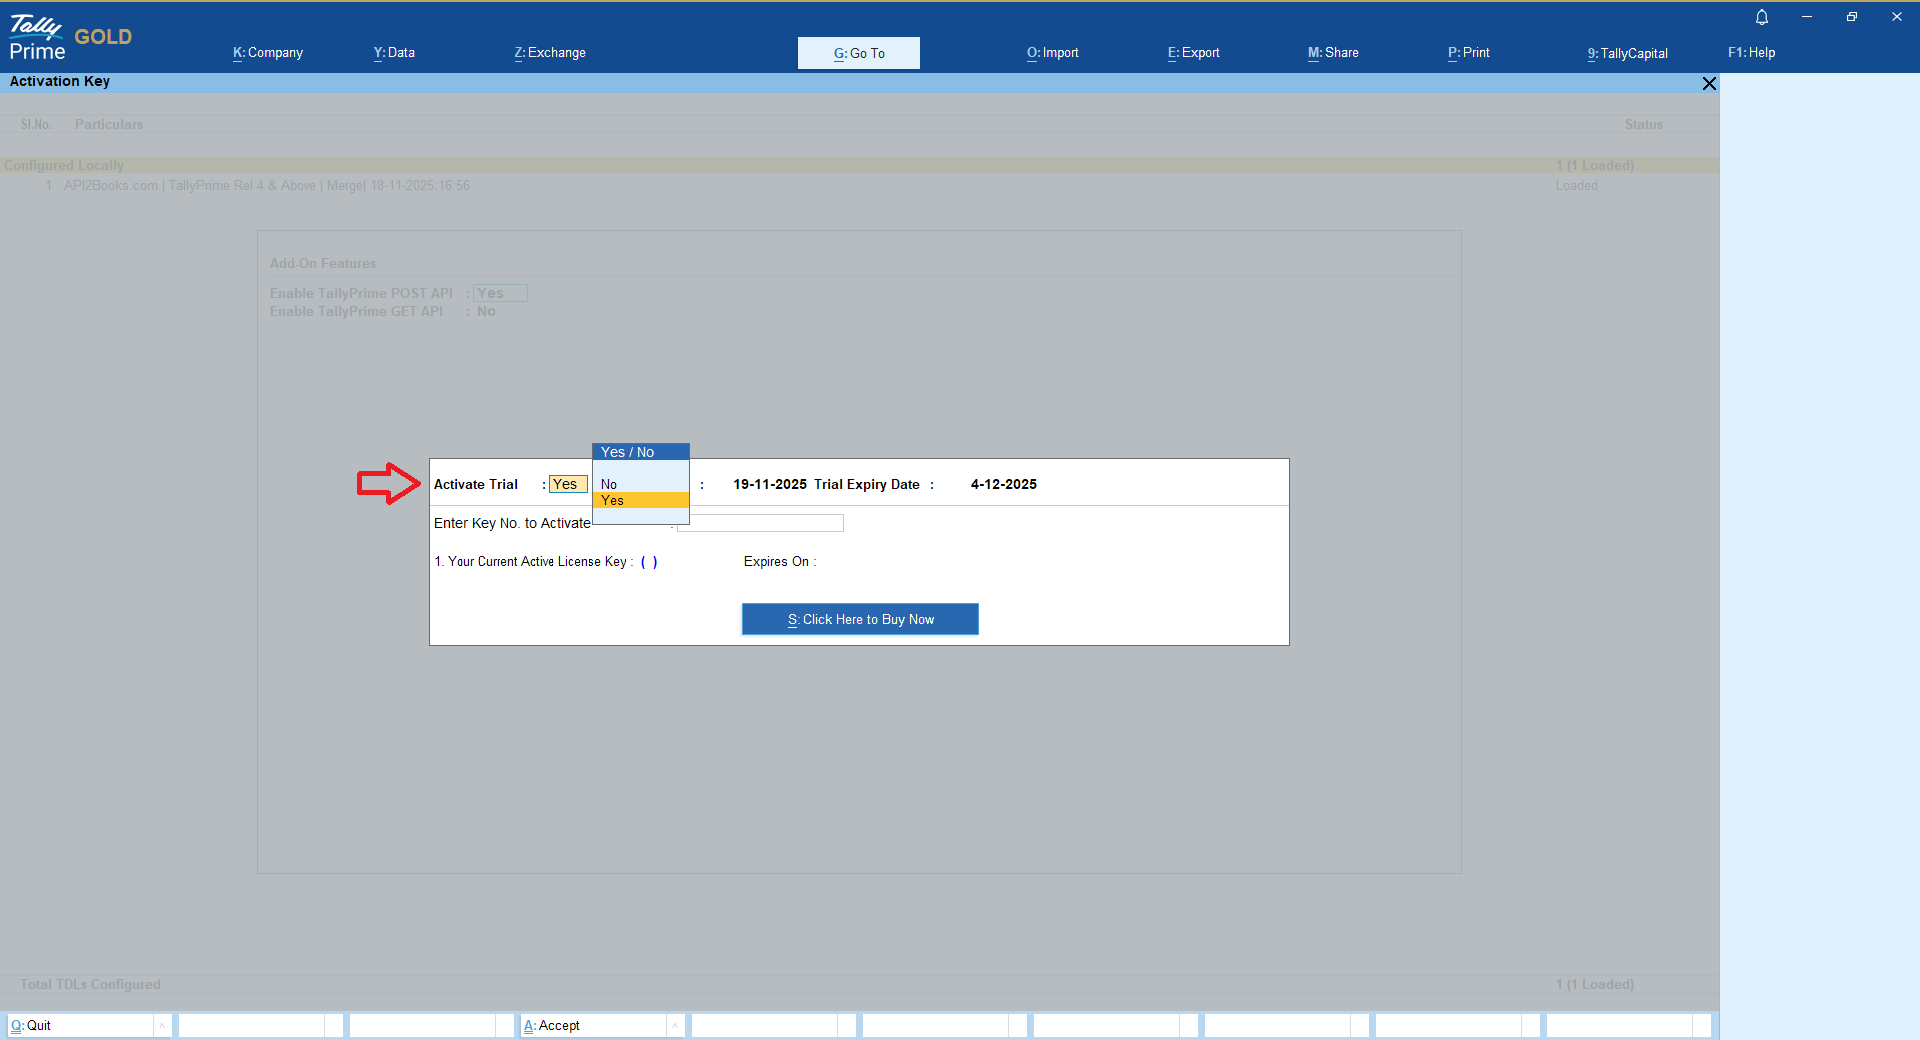
Activate Free Trial
You can activate 15 Days free trial as shown in below snapshot.
Free trial activation works on only a valid TallyPrime License only….it won’t work on TallyPrime Edu Version.
If you are not having TallyPrime license then you can buy the same or can get 7 days free trial
Activate License
If you have already subscribed our Monthly or Yearly TallyPrime POST API subscription then you may activate the same as shown in below snapshot;
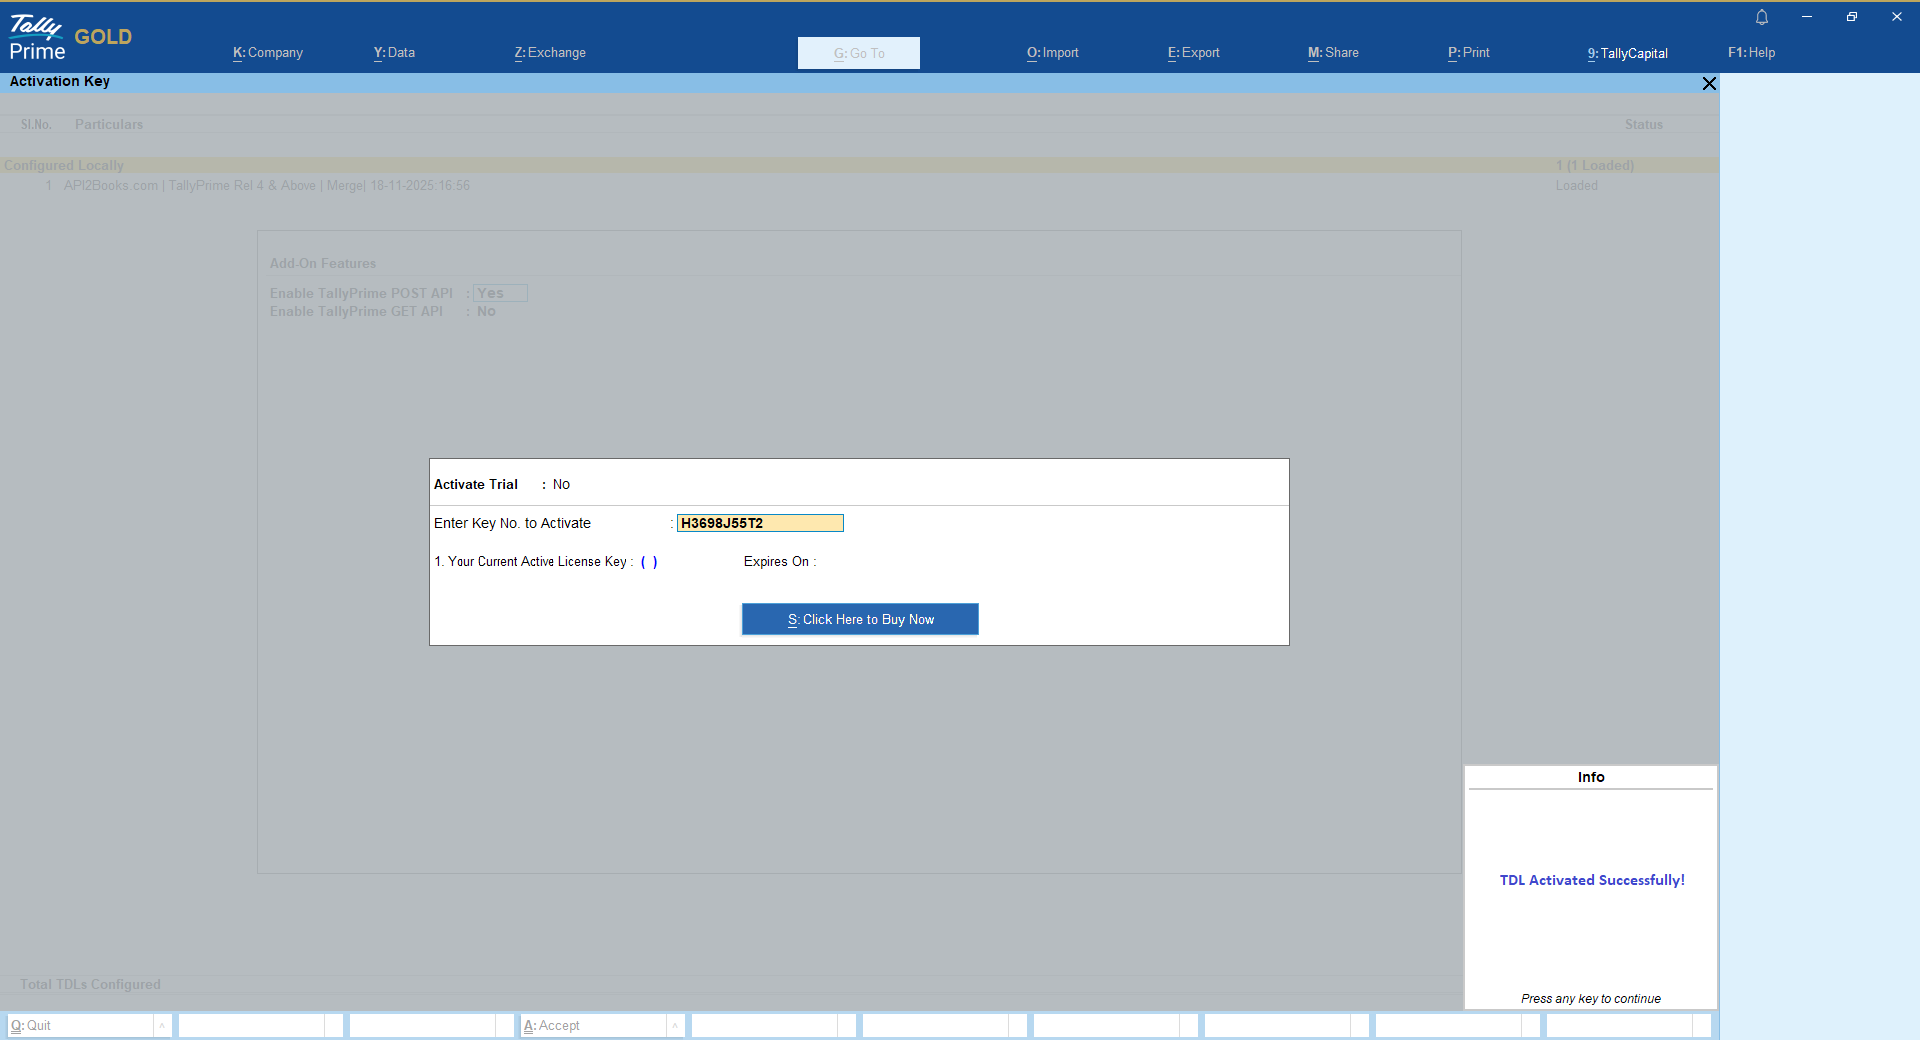
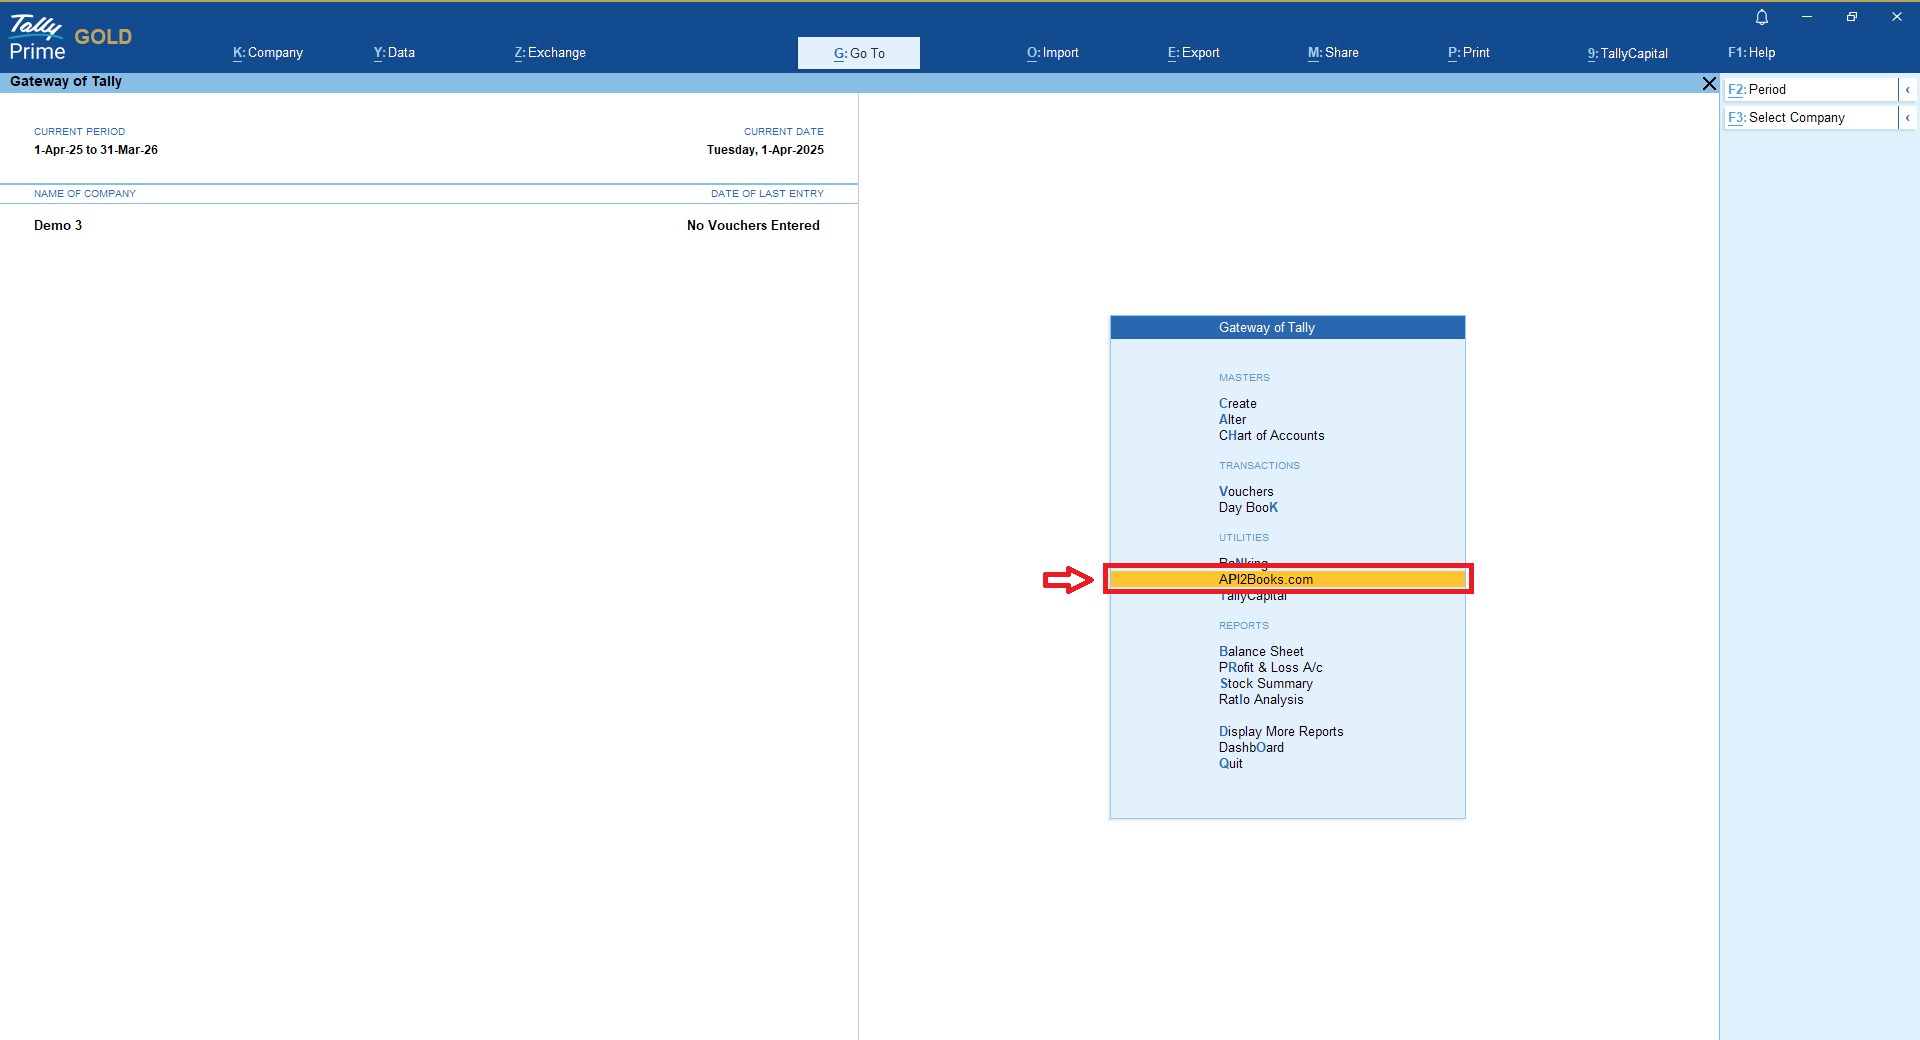
Once you activate the module, you will find new menu on Gateway of Tally under utilities as“API2Books.com”
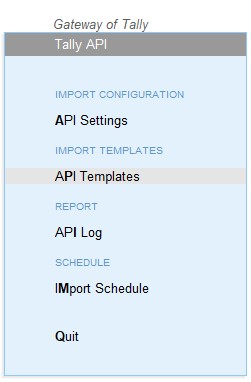
POST API Settings in TallyPrime
Go to POST API Settings and paste the Test or Live Auth Key you got from the Dashboard as explained in above section and Company Name or Short Name that will be used by your Third-party software developer
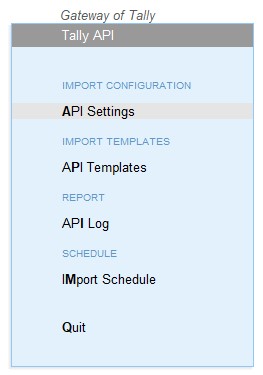

Sync Data with POST API Server
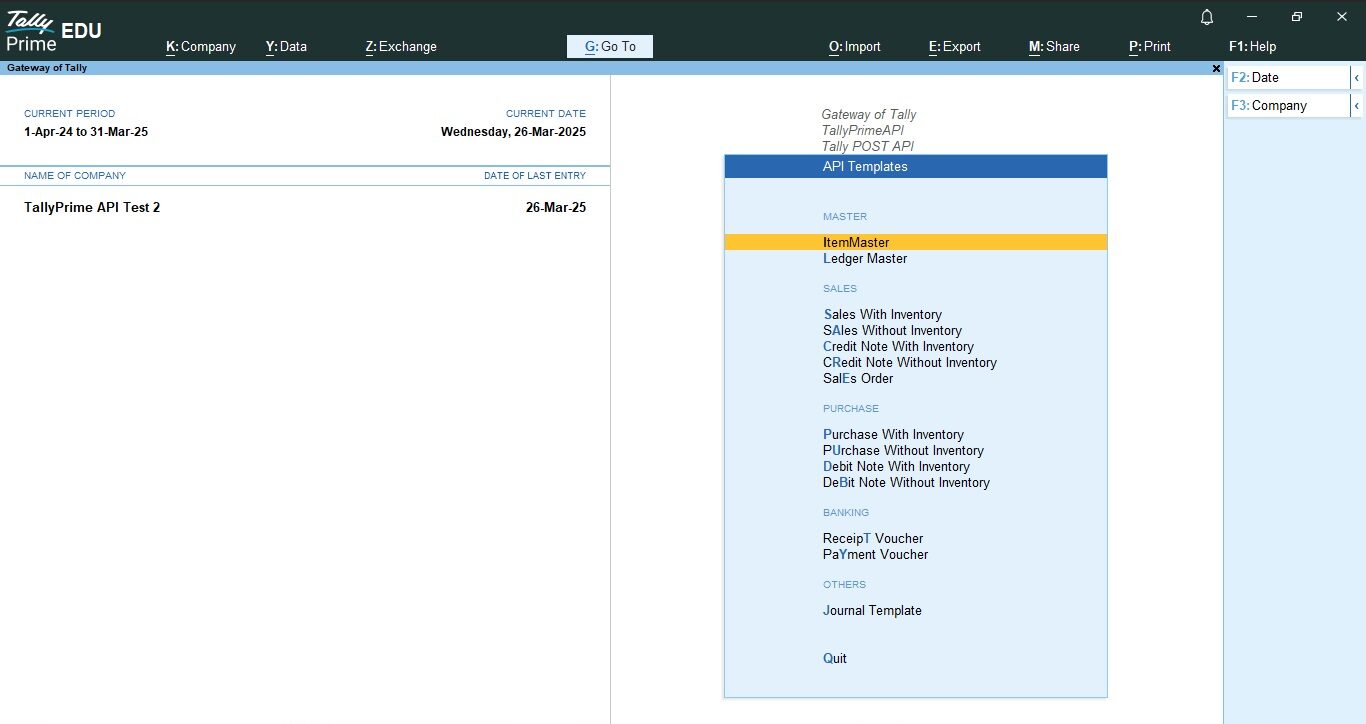
Go to API Template to sync data manually from the POST API Server;
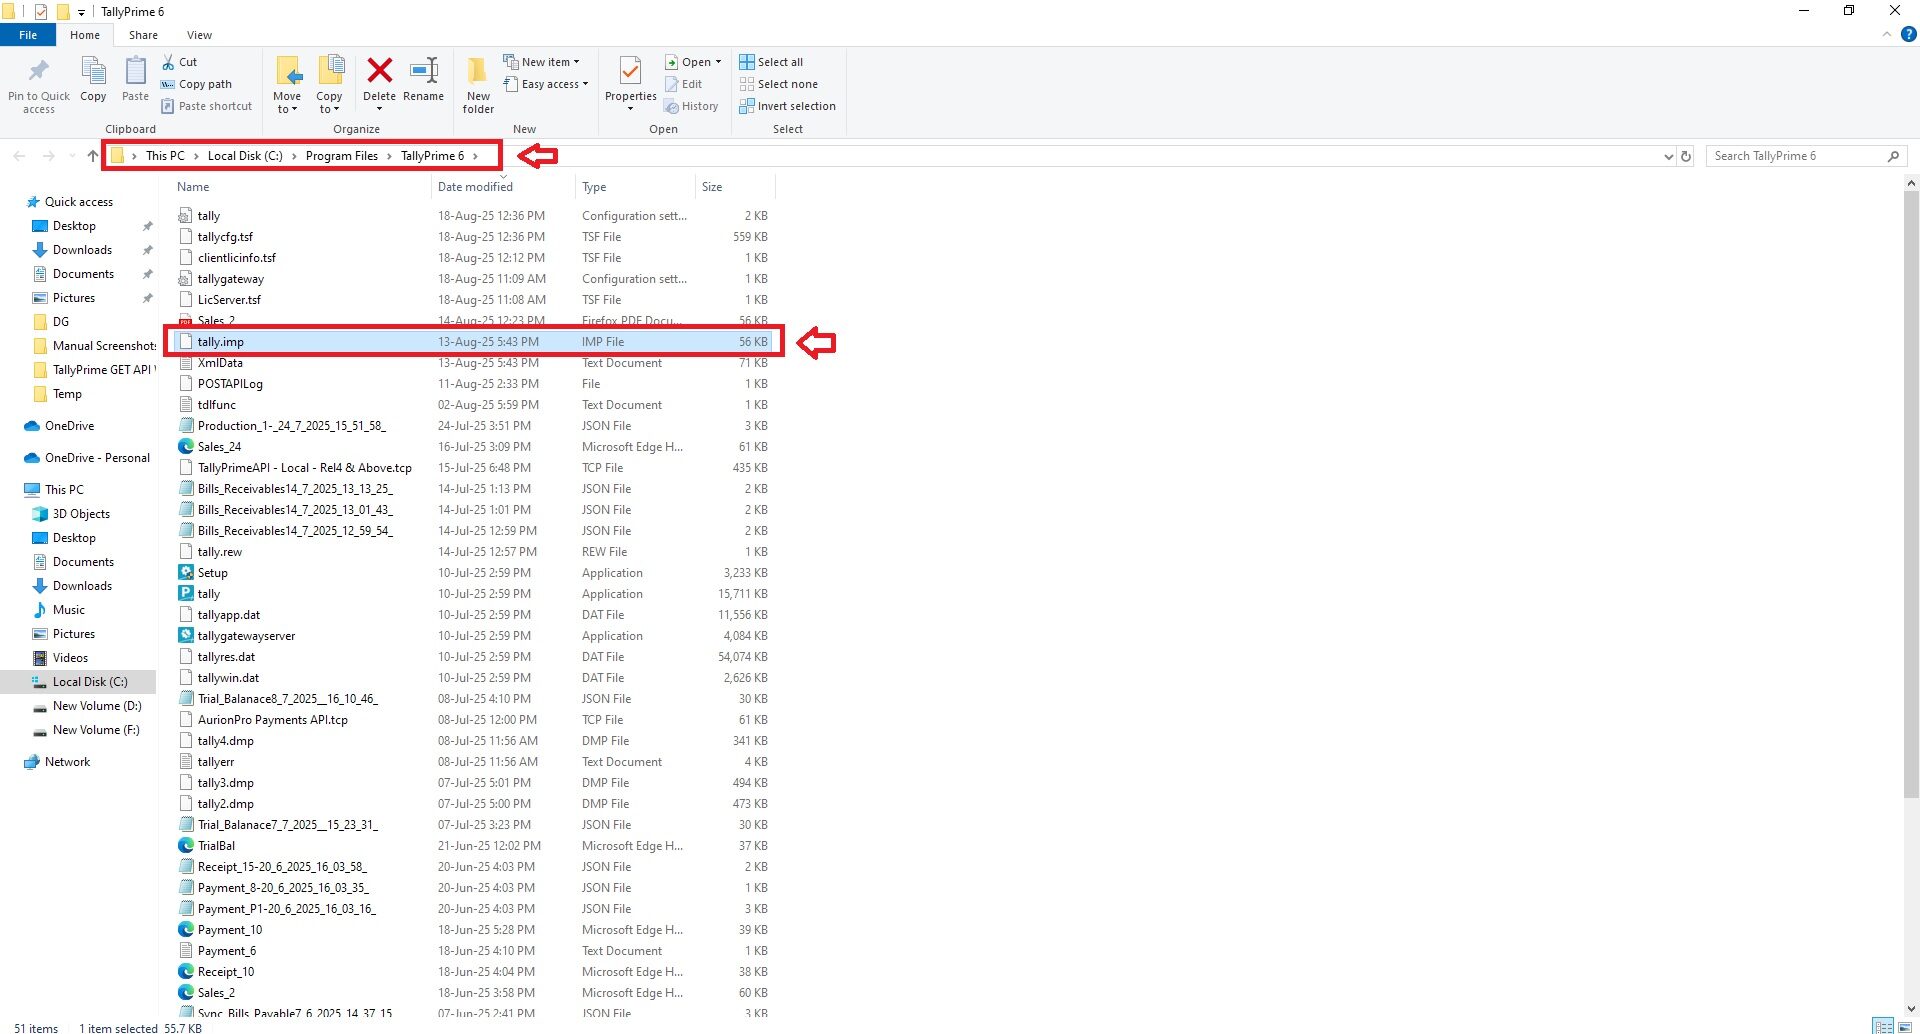
As soon as you hit enter on any of these templates, it will start syncing data with API server. It is recommended to check the error log after each import to check whether any errors encountered or not during data import, check Tally.imp file found under the TallyPrime folder.
If you notice any errors in the Tally.imp then you are advised to take help from your accounts team to understand the error and get it resolved for the error free import of current or future data.
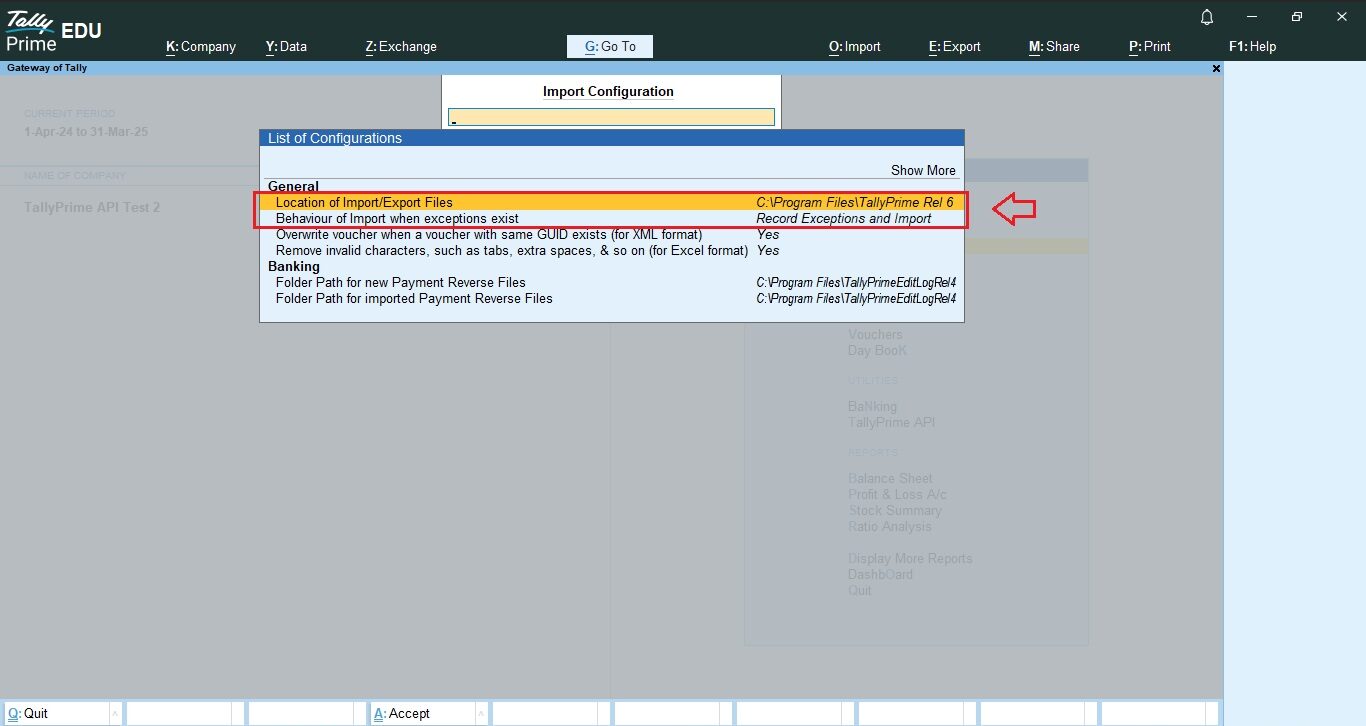
Data Import Settings & Error Handling
Make sure your default data import directory is set as TallyPrime directory only and behavior of Import is set as “Record Exception and Import”
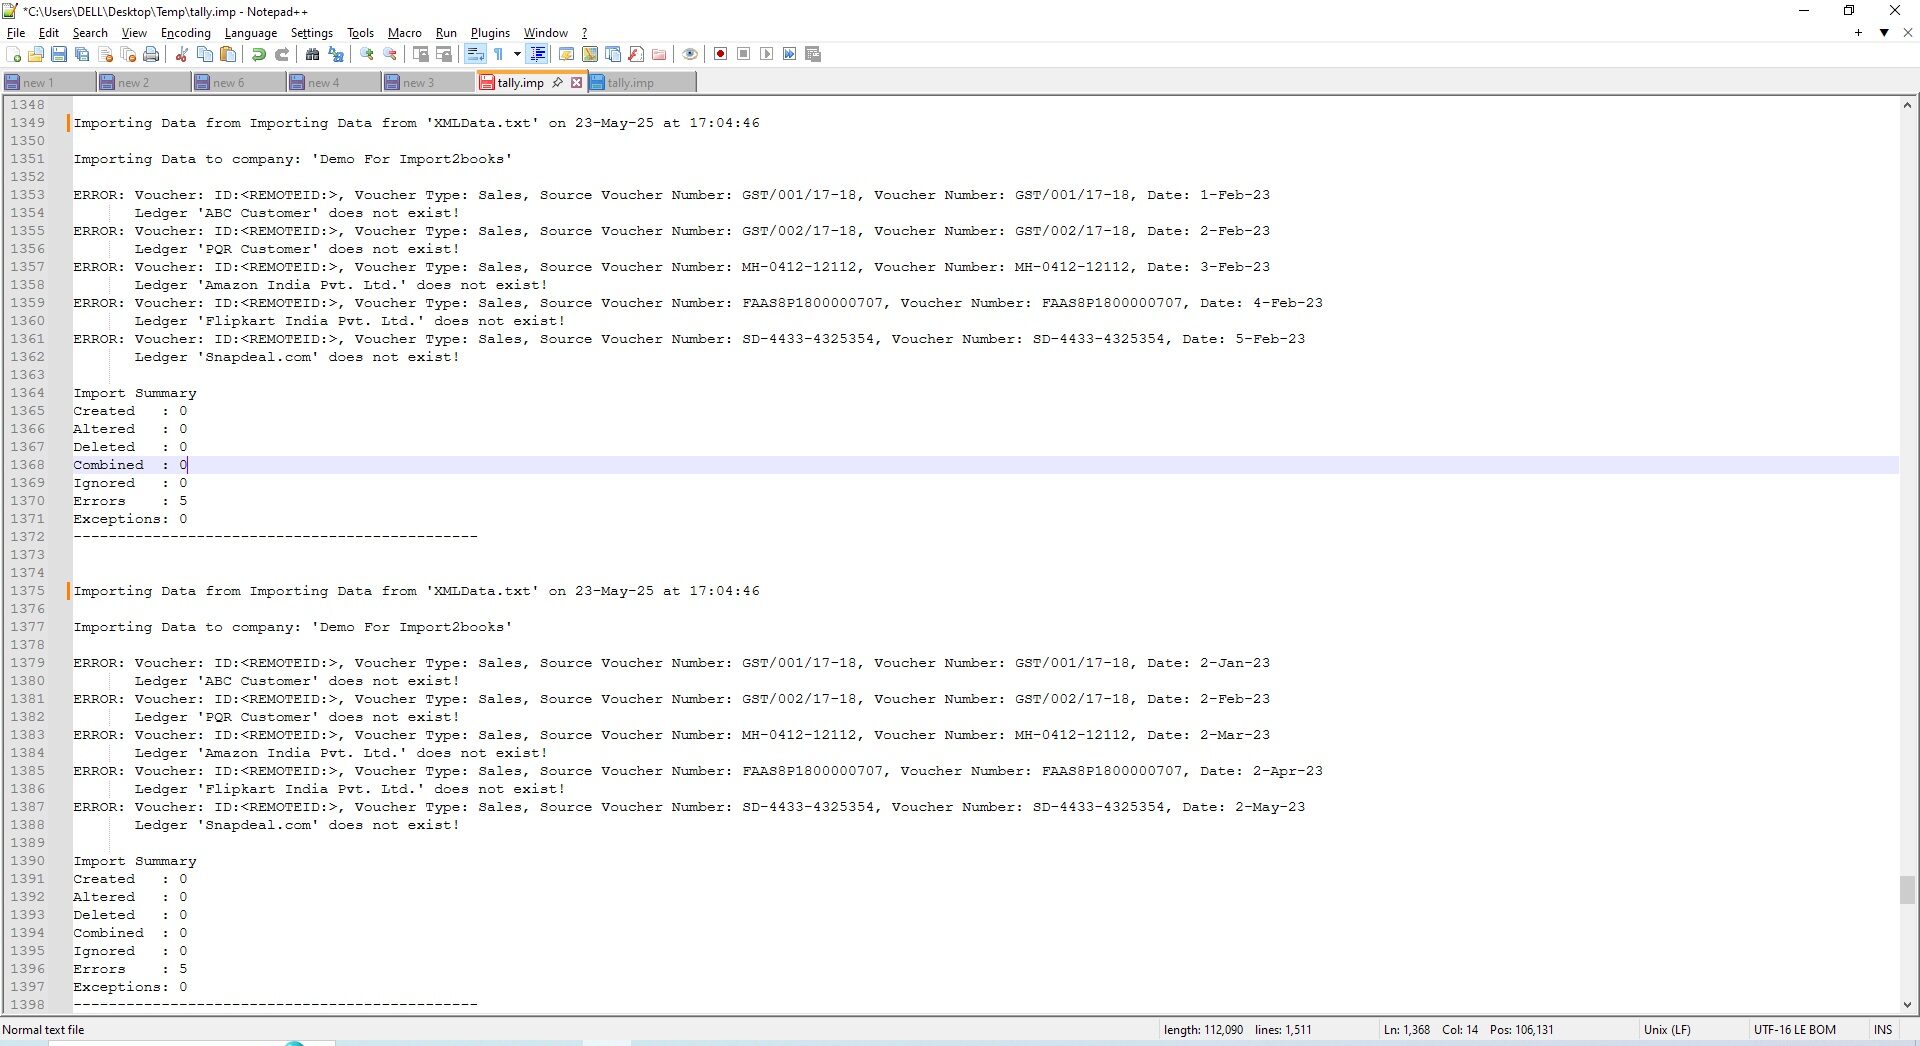
Data Import Log
Do check the Tally data import log file to see the details of each records imported and not imported with possible error reasons.
This import log file can be found under TallyPrime application directory named as “Tally.IMP” file. Open it in Notepad and always check latest import log details at the end of the file.
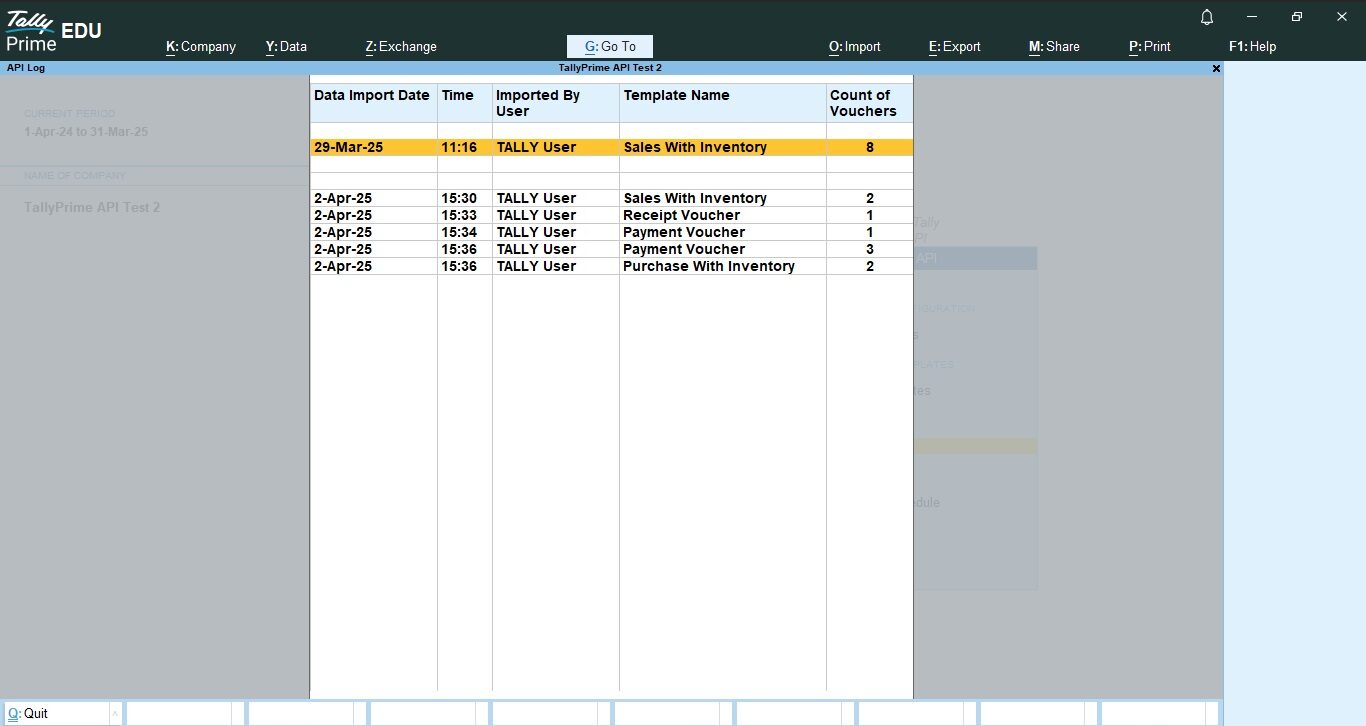
POST API Events Log
This will display POST API data import log
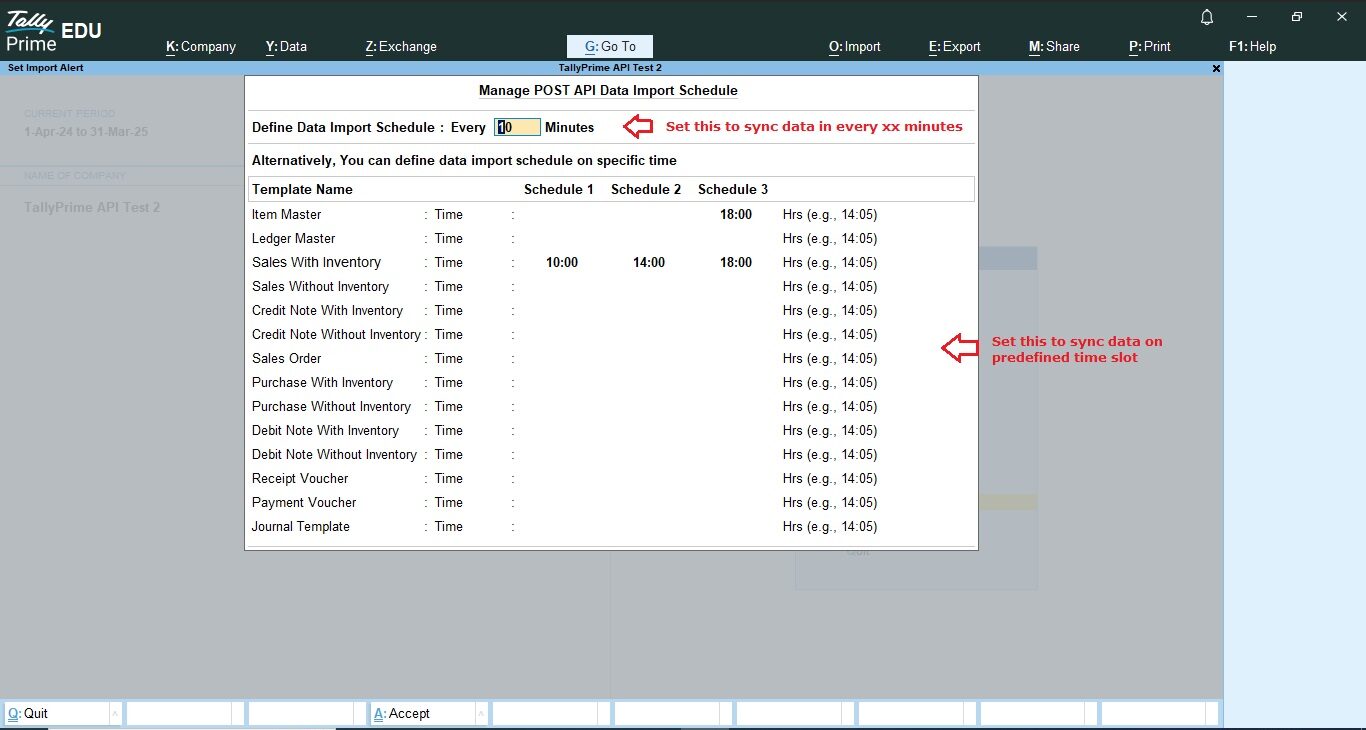
POST API Data Import Schedule
Use schedule option if you wish to auto import data in TallyPrime via third-party applications without any user intervention or manual data import tasks.
Please Note that schedule will work only when TallyPrime and required company is open.
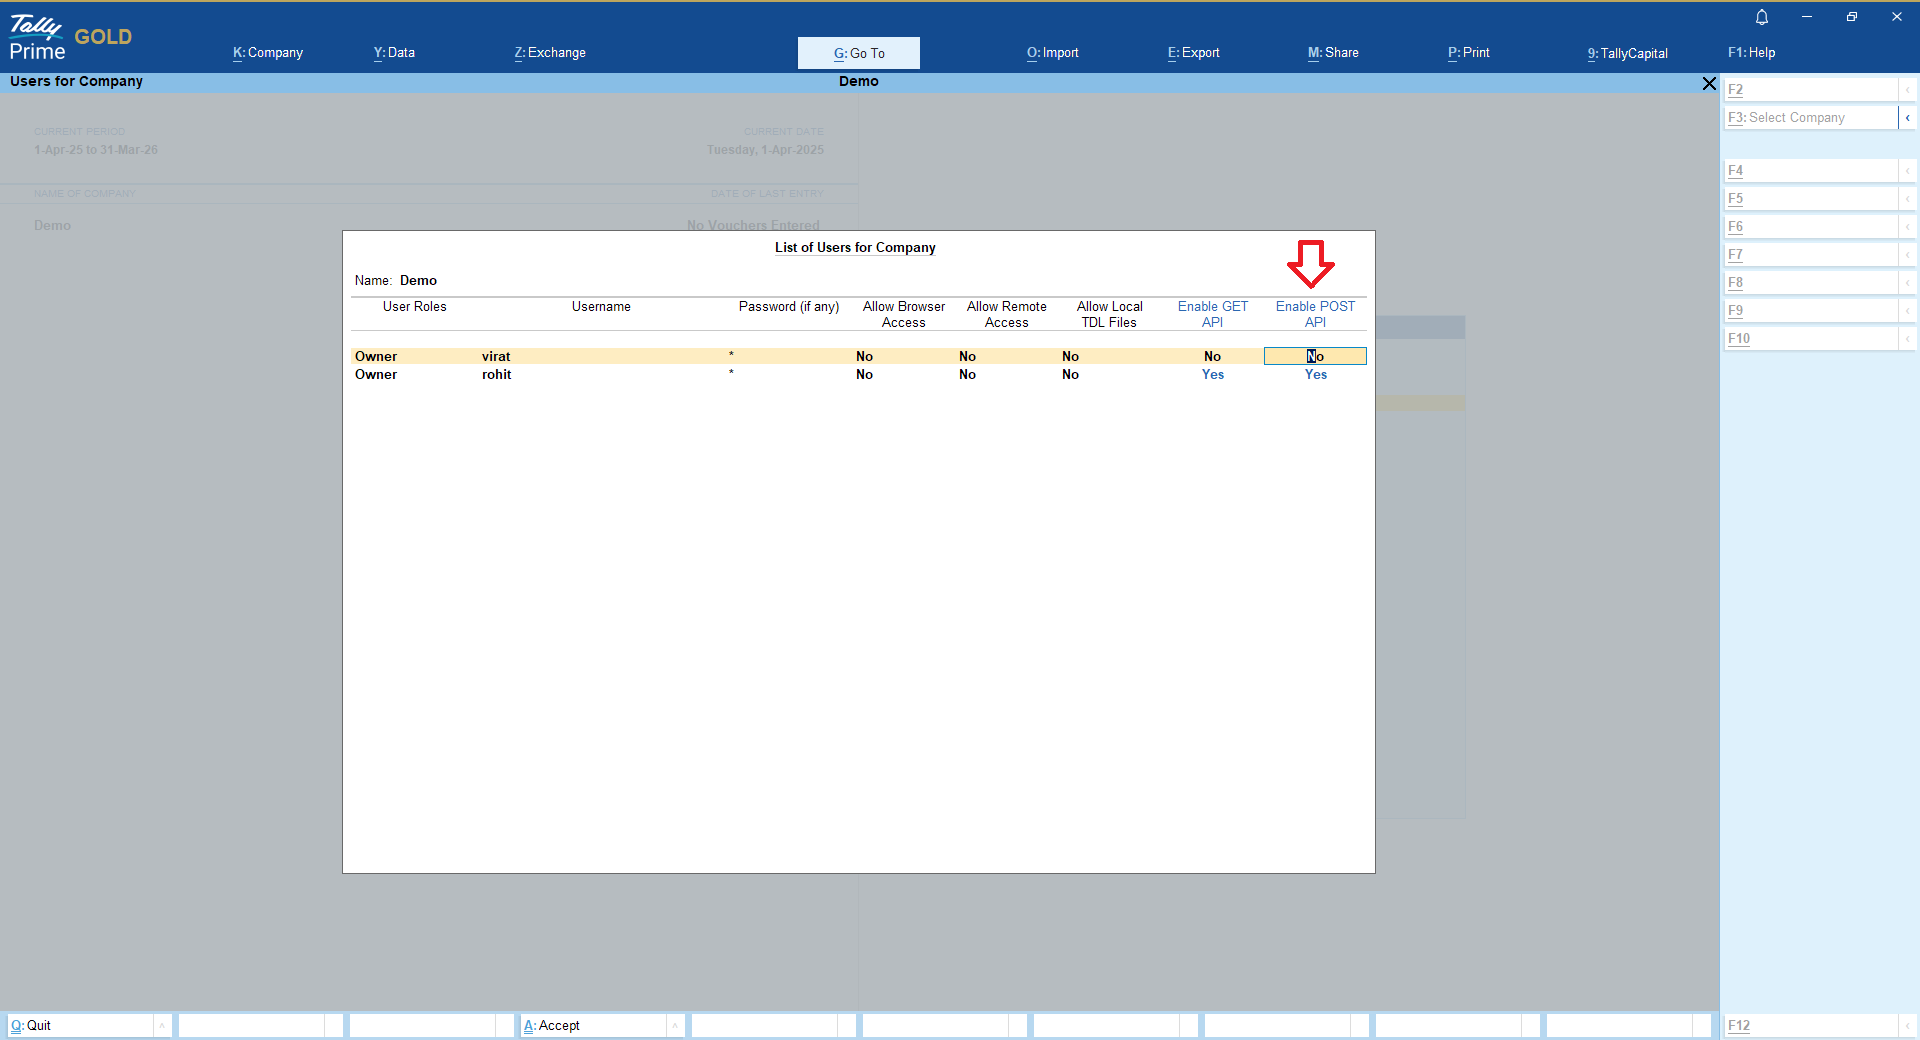
User Wise Security
As a admin you may allow or disallow user to access API modules
Download Latest TallyPrime GET & POST API Plugin Now
If you still face any difficulties in following above guided steps, you may reach us on support@api2books.com from Monday to Saturday 10:00AM to 6:00PM
